


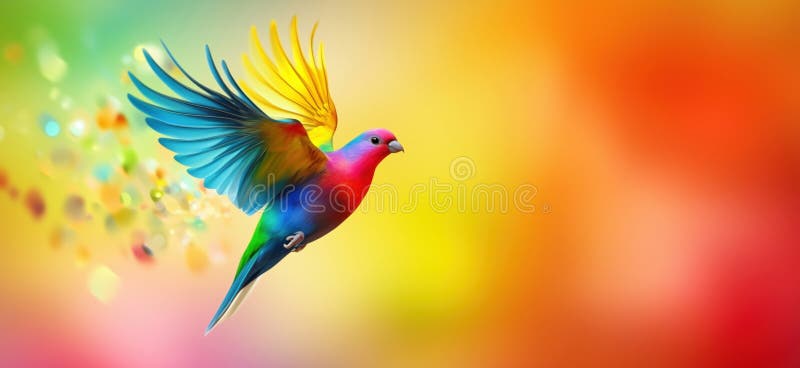
Have you ever looked at a majestic lion, a playful kitten, or even a tiny hummingbird and thought, “I wish I could capture that beauty on paper”? If so, you’re in the right place! This guide, how to draw animals, is designed to unlock your inner artist and bring the incredible world of wildlife to life through your own creations.
Maybe you’re a complete beginner, someone who hasn’t picked up a pencil since grade school. Or perhaps you’re looking for fun and engaging kids drawing animals activities. Whatever your starting point, we’ll journey together, step-by-step, from the very foundations of sketching to creating surprisingly realistic animal portraits.
Forget feeling intimidated by complex forms! We’ll start by breaking down each animal into simple, manageable shapes – circles, squares, and triangles – building up the form gradually. We’ll cover everything from essential tools and techniques like mastering line control, to the specifics of rendering fur, feathers, scales, and skin.
Inside, you’ll find detailed instructions for drawing animals like beloved pets – a happy dog, a mischievous cat – and more exotic creatures like powerful lions, graceful giraffes, and even serene owls. We’ll explore how to capture the unique personality of each animal, adding details that truly make your artwork shine. We’ll even delve into the fascinating world of reptiles and amphibians, learning to depict their textures and patterns.
This isn’t just about copying images; it’s about understanding how animals are built, and learning to see the world around you with an artist’s eye. By the end of this guide, you’ll not only be able to draw a stunning array of animals, but you’ll also have a solid foundation for continuing your artistic journey and developing your own unique style. So, grab your pencils, paper, and let’s begin!
Getting Started: Essential Tools & Techniques
So, you’re eager to learn how to drawing animals? Fantastic! That’s a wonderful journey you’re about to embark on. It’s incredibly rewarding to see a creature come to life on the page, born from your imagination and skill. But before we dive into drawing majestic lions or playful kittens, let’s lay a solid foundation. This section is all about equipping you with the essential tools and techniques you’ll need to succeed. Think of it as building the workshop before you start crafting. It’s not about having the most expensive tools, but about understanding what each one does and how to use it effectively. We’ll cover understanding basic shapes, gathering your art supplies, and mastering line control and sketching – the three pillars of any successful drawing.
Understanding Basic Shapes
This might sound…basic, right? But trust me, it’s the cornerstone of almost all drawing, especially when learning how to drawing animals. Animals, despite their incredible diversity, are built from a surprisingly limited set of fundamental shapes. Think about it: a sphere for the head, cylinders for the legs, ovals for the body. Learning to see these shapes within the animal’s form is the first step to accurately representing it.
Fundamental geometric shapes used in drawing
Let’s break it down. Start by practicing drawing these shapes repeatedly:
- Spheres: These are great for heads, bodies (especially rounded ones like bears or seals), and even parts of limbs. Focus on creating a perfectly round form, and then practice shading it to give it volume.
- Cubes & Rectangular Prisms: These are excellent for building the torso, chests, and even the basic structure of legs. Think of a cube as a simplified box.
- Cylinders: These are perfect for legs, necks, and even the body of more slender animals like deer or horses. Imagine a can – that’s a cylinder!
- Cones: Useful for snouts, horns, and even the tapering of limbs.
- Pyramids: Can be used for simplified heads or the base of horns.
The key isn’t to draw perfect shapes initially. It’s about training your eye to recognize them in the real world and in reference photos. Grab some photos of animals – your pets, animals from magazines, or images online – and try to break them down into these basic forms. Lightly sketch over the photo, outlining the shapes you see. Don’t worry about details yet; just focus on the underlying structure. This exercise will dramatically improve your ability to construct animals accurately.
Think of a dog, for example. You can start with an oval for the body, a sphere for the head, and cylinders for the legs. Connect these shapes, and you have a rough outline of a dog! From there, you can refine the form and add details. This approach is incredibly helpful for kids drawing animals too, as it simplifies the process and makes it less intimidating. It’s about building up complexity from simplicity.
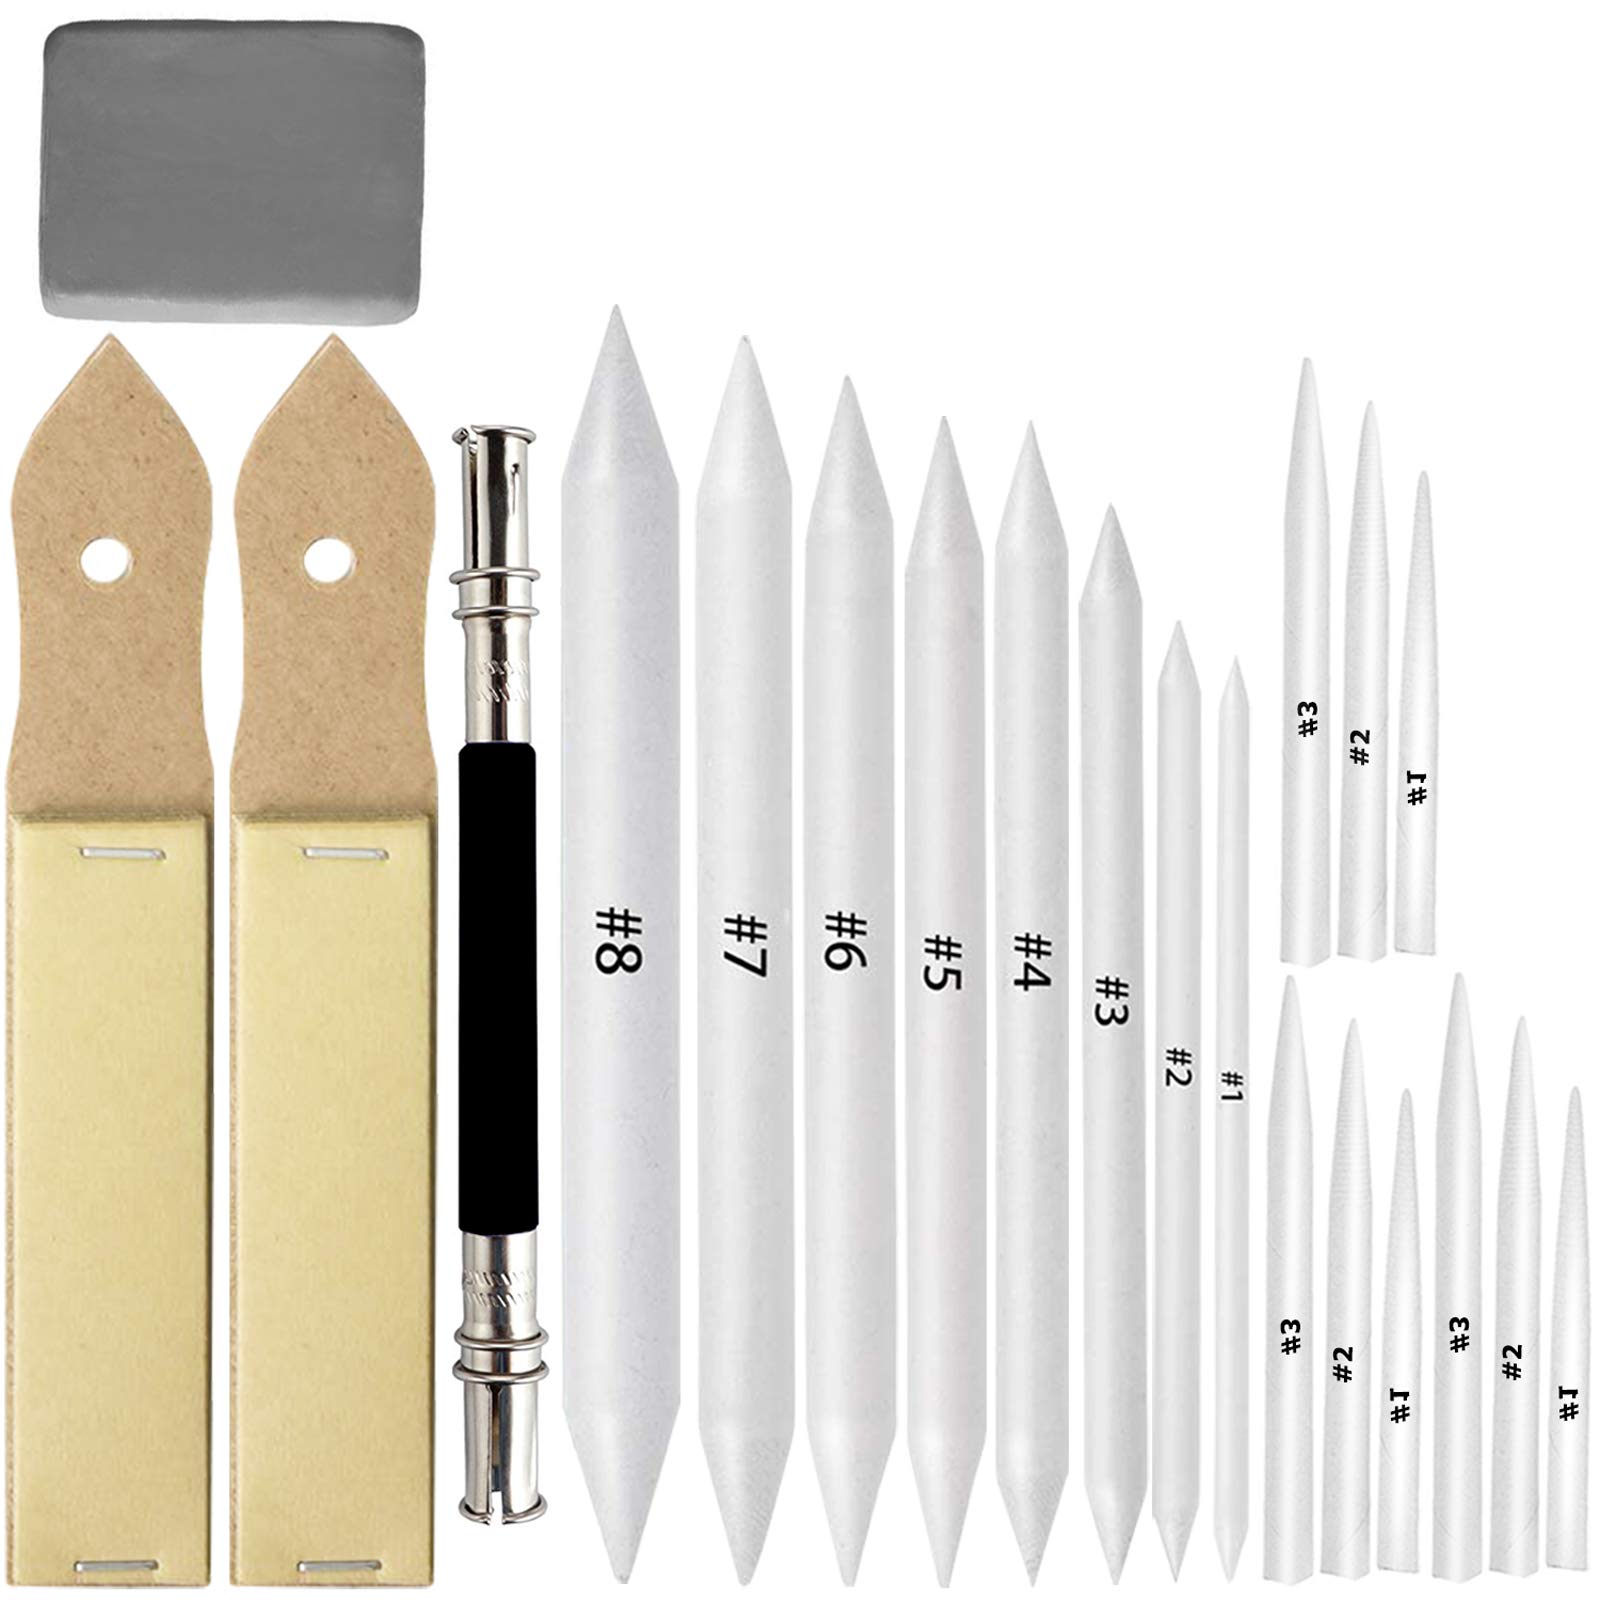
Gathering Your Art Supplies
Okay, you’ve got the foundational understanding of shapes. Now, let’s talk tools! You don’t need a massive, expensive setup to get started. A few quality basics will go a long way. Here’s a breakdown of what I recommend:
- Pencils: This is your workhorse. I recommend a set of graphite pencils ranging from 2H (hard, light lines) to 6B (soft, dark lines). A good starting point is a set with 2H, HB, 2B, 4B, and 6B. The ‘H’ pencils are great for light sketching and construction lines, while the ‘B’ pencils are ideal for shading and adding depth.
- Eraser: A kneaded eraser is a must-have. Unlike a regular eraser, it doesn’t leave residue and can be molded into different shapes for precise erasing. A plastic or vinyl eraser is also useful for more thorough erasing.
- Paper: Start with a sketchbook or pad of drawing paper. Look for paper that’s at least 60lb weight (90gsm) to prevent it from buckling when you apply shading. Smooth paper is good for detailed work, while textured paper is better for looser, more expressive drawings.
- Blending Stumps/Tortillions: These are tightly rolled paper tools used for blending graphite and creating smooth transitions in your shading. You can also use a cotton swab or even your finger (though be mindful of smudging!).
- Sharpener: A good quality pencil sharpener is essential for maintaining a sharp point. A handheld sharpener is fine, but a rotary sharpener can give you a more consistent point.
Essential art supplies for beginners
Don’t feel pressured to buy everything at once. Start with a basic set of pencils, an eraser, and a sketchbook. As you progress and discover your preferences, you can add more specialized tools. For drawing animals, consider adding colored pencils or watercolor paints later on to bring your creations to life.
A little tip: experiment with different brands of pencils and paper to find what works best for you. Everyone has their preferences, and finding the right tools can make a big difference in your enjoyment and results.
Mastering Line Control & Sketching
Now for the fun part: actually putting pencil to paper! Line control is crucial for creating dynamic and expressive drawings. It’s not just about drawing a straight line (though that’s helpful!). It’s about varying the weight, pressure, and speed of your lines to create different effects.
- Line Weight: Pressing harder with your pencil creates a thicker, darker line, while pressing lighter creates a thinner, lighter line. Use line weight to emphasize certain areas of your drawing and create a sense of depth. For example, you might use a thicker line to outline the silhouette of an animal and thinner lines for internal details.
- Line Quality: Experiment with different types of lines: smooth, jagged, broken, curved. Each type of line can convey a different feeling or texture. A smooth line might be used for a sleek, polished surface, while a jagged line might be used for a rough, textured surface.
- Sketching Techniques: Start with light, loose sketches to establish the basic form and proportions of your animal. Don’t be afraid to make mistakes! That’s what the eraser is for. Gradually build up the details, adding darker lines and more precise shapes as you go.
Here are a few exercises to help you improve your line control:
- Line Drills: Fill a page with straight lines, curved lines, and circles. Focus on maintaining consistent line weight and smoothness.
- Shape Practice: Draw a series of basic shapes (spheres, cubes, cylinders) and practice shading them with different line weights and blending techniques.
- Contour Drawing: Choose a simple object (like a fruit or a leaf) and draw its outline without looking at your paper. This exercise forces you to focus on the shape and form of the object and improves your hand-eye coordination.
Remember, practice makes perfect. The more you sketch, the more comfortable and confident you’ll become with your lines. Don’t be afraid to experiment and find your own style. And most importantly, have fun! Learning how to drawing animals is a process, and it takes time and effort. But with dedication and practice, you’ll be amazed at what you can achieve. This is where the journey truly begins, and it’s a journey filled with creativity, discovery, and the joy of bringing the animal kingdom to life on paper. Don’t be discouraged if your first attempts aren’t perfect. Every artist starts somewhere, and every line you draw is a step forward.
Drawing Mammals: From Simple Forms to Furry Friends
This section is all about bringing the warmth and personality of mammals to life on paper. We’ll move beyond basic shapes and start to build creatures that feel real, focusing on capturing their unique characteristics. It’s incredibly rewarding to see a furry friend emerge from a few simple lines, and this is where the fun really begins! Remember, patience is key. Don’t get discouraged if your first attempts aren’t perfect. Every stroke is a learning opportunity. We’ll start with the familiar, then move onto more majestic beasts.
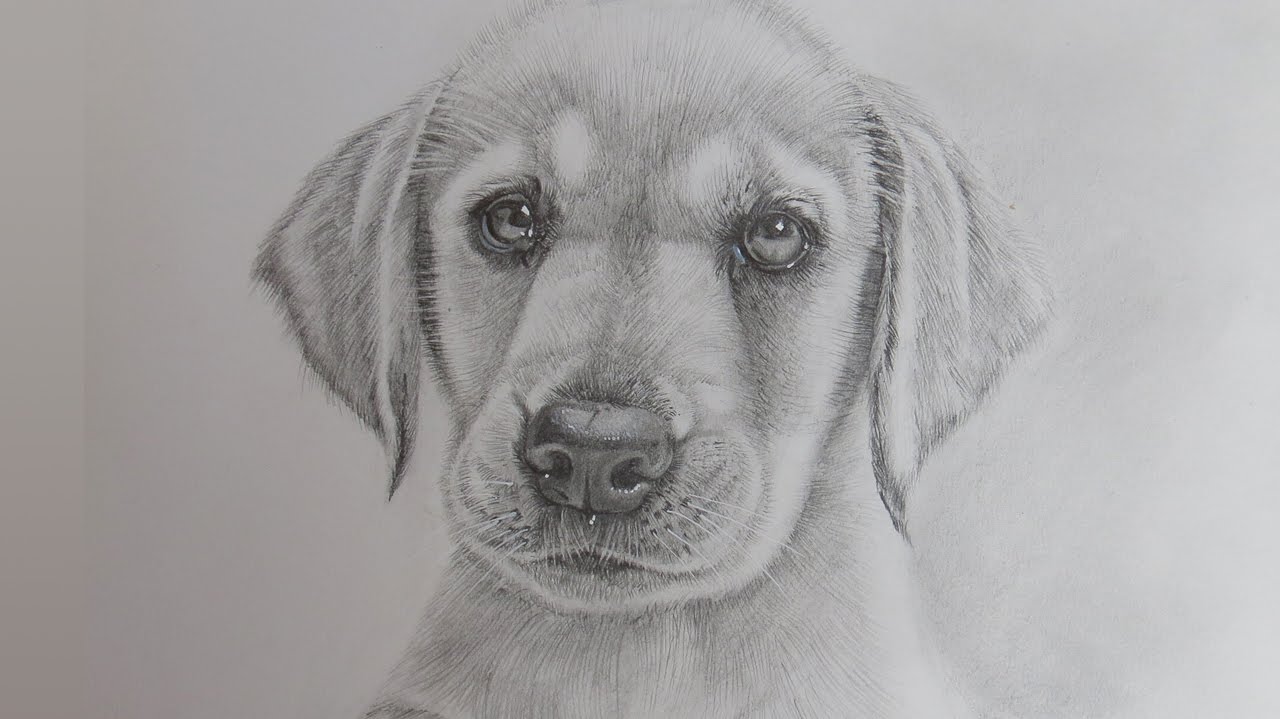
Drawing a Realistic Dog
Dogs are arguably humanity’s best friend, and a fantastic subject for learning to draw mammals. Their variety in breeds offers a huge range of practice opportunities, but we’ll focus on a generally representative dog – think a Labrador or Golden Retriever – to establish core principles. The goal here isn’t to create a perfect replica of a specific dog, but to understand the underlying anatomy and how to translate that into a believable drawing.
Stepbystep guide to drawing a realistic Labrador Retriever
The first thing to remember is that dogs, despite their diverse appearances, share a common skeletal structure. Understanding this structure will make your drawings much more convincing. We’ll begin with light, loose sketches – don’t press too hard with your pencil at this stage. Think of building with blocks.
Step 1: The Foundation – Basic Shapes. Start with a large oval for the chest and a slightly smaller oval for the abdomen. These don’t need to be perfect circles; dogs aren’t perfectly symmetrical! Connect these ovals with a curved line to form the spine. This is your dog’s core.
Step 2: Adding the Head. Attach a circle to the front of the chest oval for the head. The size of the circle will depend on the breed you’re aiming for – a Bulldog will have a larger head relative to its body than a Greyhound.
Step 3: Limbs as Cylinders. Use cylinders to represent the legs. Pay attention to the angles of the legs – are they straight, bent, or splayed? This will determine the dog’s pose. Keep these lines light and flexible, as you’ll be refining them later.
Step 4: Refining the Form. Now, start to connect the shapes, smoothing out the lines and defining the dog’s overall silhouette. Consider the breed’s musculature. A muscular dog will have more defined curves and angles.
Constructing the Dog’s Body with Shapes
This is where we move from a skeletal framework to a more fleshed-out form. We’re still working with simplified shapes, but we’re starting to add volume and definition.
Step 1: Defining Muscle Groups. Lightly sketch in the major muscle groups – the shoulders, chest, and hindquarters. Don’t worry about anatomical accuracy at this stage; just focus on suggesting the underlying structure.
Step 2: Adding Volume. Round out the shapes, adding curves and contours to create a sense of volume. Pay attention to how the muscles attach to the bones.
Step 3: The Tail. Add the tail, considering its length, thickness, and position. The tail is a great indicator of the dog’s mood – a wagging tail suggests happiness, while a tucked tail suggests fear or submission.
Step 4: Refining the Proportions. Step back and assess your drawing. Are the proportions correct? Is the head too big or too small? Are the legs too long or too short? Make adjustments as needed. This is a crucial step – accurate proportions are essential for creating a believable drawing.
Adding Details: Head, Ears, and Tail
Now for the fun part – adding the details that bring your dog to life!
Step 1: The Head – Muzzle and Eyes. Start with the muzzle. Observe the shape of the muzzle in your reference image. Is it long and slender, or short and blunt? Add the eyes, paying attention to their shape, size, and placement. The eyes are the windows to the soul, so spend some time getting them right.
Step 2: Ears – Shape and Position. The ears are another defining feature of a dog. Consider the breed – floppy ears, pointed ears, or somewhere in between? Sketch in the ears, paying attention to their shape and position.
Step 3: The Tail – Fur and Movement. Add details to the tail, suggesting fur and movement. A flowing tail will add a sense of dynamism to your drawing.
Step 4: Refining the Features. Now, go back and refine all the details, adding subtle nuances and expressions. This is where your artistic skill really comes into play.
Shading and Texture for a Lifelike Appearance
Shading is what transforms a flat drawing into a three-dimensional form. It’s also what adds realism and depth.
Step 1: Identifying Light Source. Determine where your light source is coming from. This will dictate where the shadows fall.
Step 2: Applying Basic Shading. Start with light, even shading across the entire drawing. Then, gradually build up the shadows in the darker areas.
Step 3: Adding Texture. Use different shading techniques to suggest fur. Short, choppy strokes can create a rough, wiry texture, while long, flowing strokes can create a smooth, silky texture.
Step 4: Highlights. Add highlights to the areas where the light is hitting the dog directly. This will create a sense of shine and realism.
Drawing a Playful Cat
Cats, with their graceful movements and enigmatic expressions, present a different set of challenges than dogs. They are more flexible and have a more subtle anatomy. Learning how to drawing animals like cats requires a keen eye for observation.
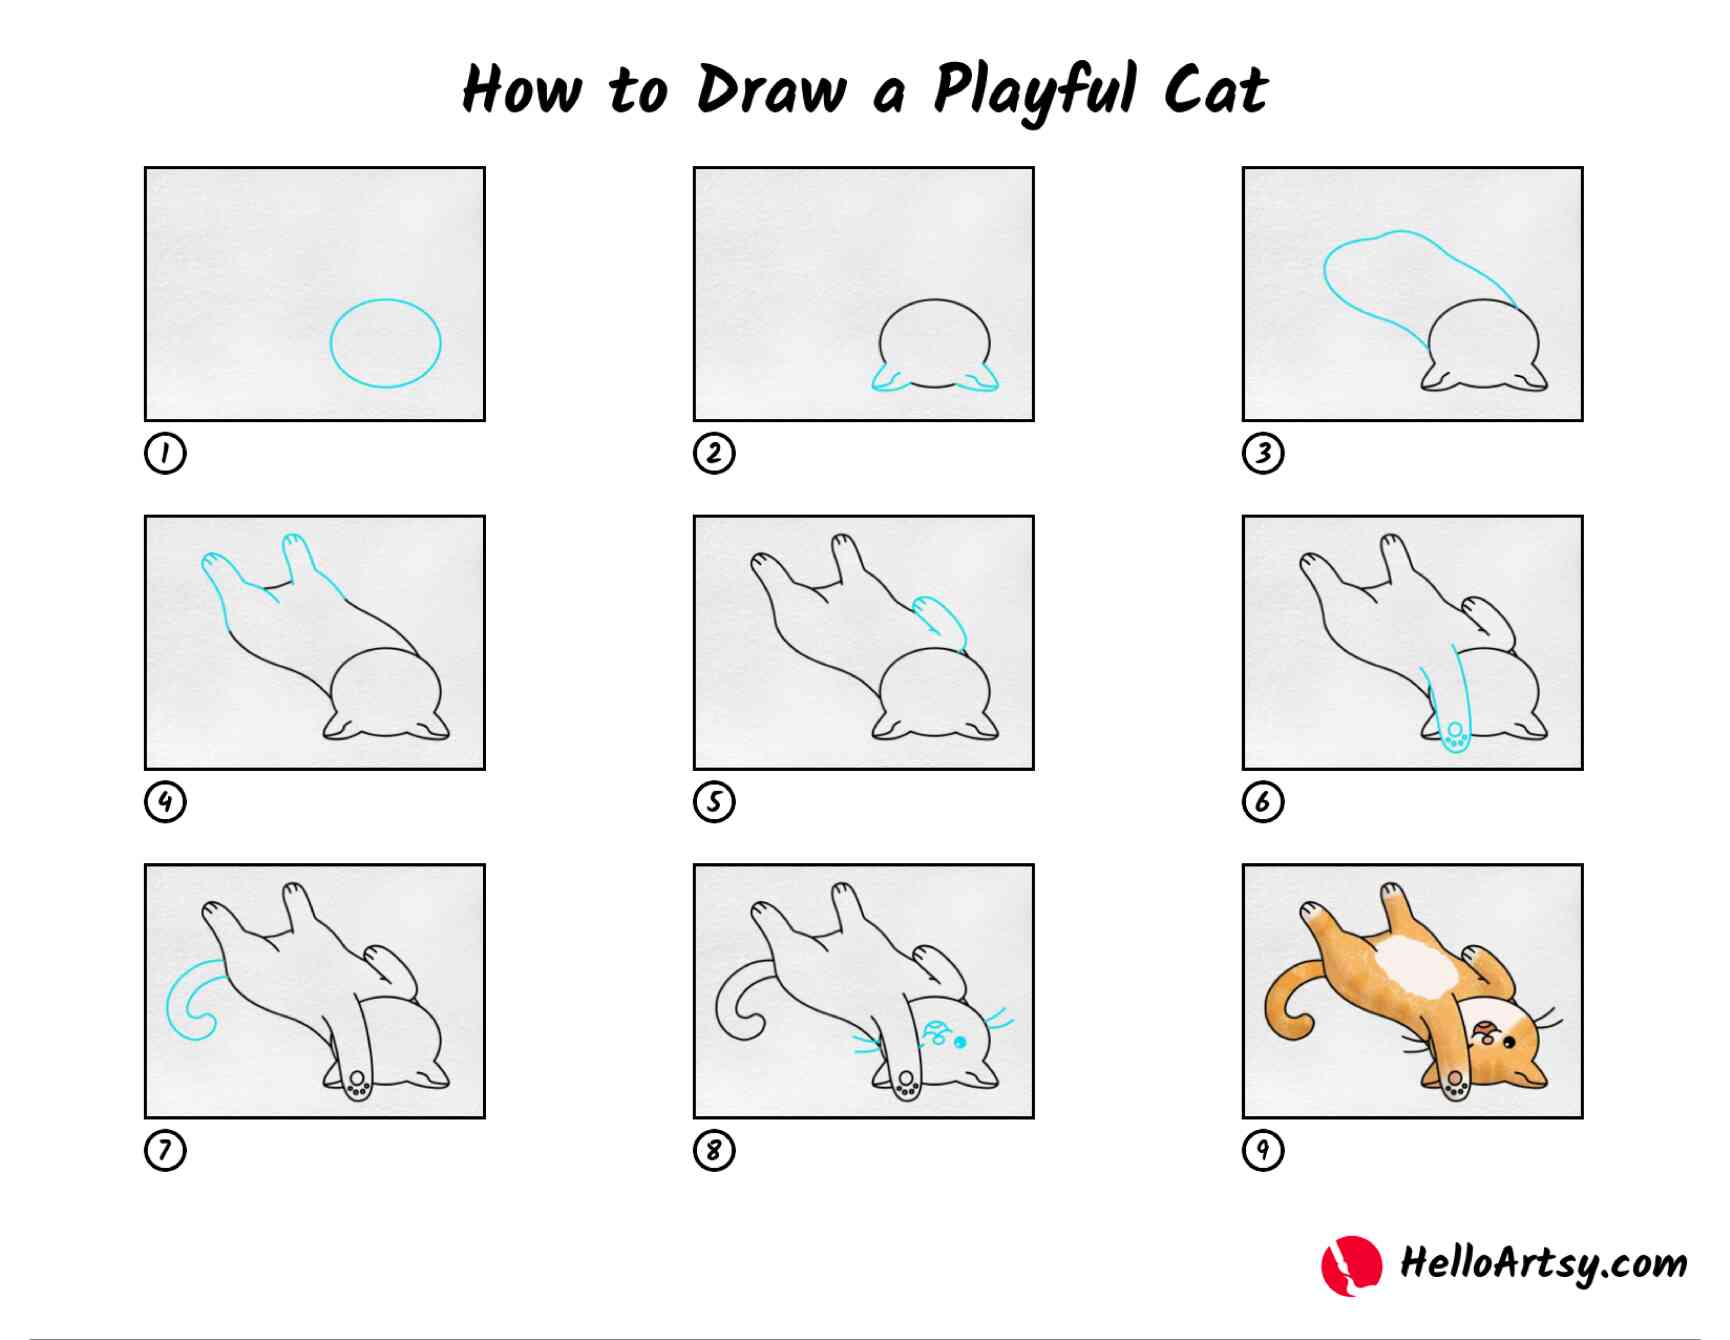
Stepbystep guide to drawing a playful cat
Blocking in the Cat’s Pose
Cats are masters of contortion, so capturing their pose is crucial.
Step 1: The Spine – A Flexible Curve. Start with a long, curved line to represent the spine. This is the foundation of the cat’s pose.
Step 2: Basic Shapes – Torso and Head. Add a simplified shape for the torso and a circle for the head.
Step 3: Limbs – Position and Angle. Sketch in the limbs, paying attention to their position and angle. Cats have incredibly flexible limbs, so don’t be afraid to experiment with different poses.
Refining the Cat’s Features
Cats have distinct facial features that contribute to their unique personality.
Step 1: The Head – Triangular Shape. Refine the head, giving it a more triangular shape.
Step 2: Eyes – Slitted Pupils. Add the eyes, paying attention to their shape and the characteristic slitted pupils.
Step 3: Ears – Pointed and Alert. Sketch in the ears, making them pointed and alert.
Step 4: Whiskers – Delicate Lines. Add the whiskers, using delicate lines to suggest their texture.
Capturing the Cat’s Personality with Details
The final touches are what bring the cat’s personality to life.
Step 1: Fur – Flowing Lines. Use flowing lines to suggest the cat’s fur.
Step 2: Expression – Subtle Nuances. Add subtle nuances to the cat’s expression – a slight tilt of the head, a playful glint in the eyes.
Step 3: Shading – Depth and Dimension. Use shading to create depth and dimension, highlighting the cat’s form.
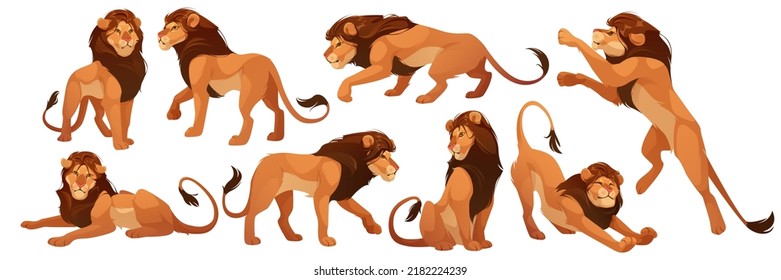
Drawing a Majestic Lion
The lion, king of the jungle, demands a different approach. It’s about power, strength, and regal bearing.
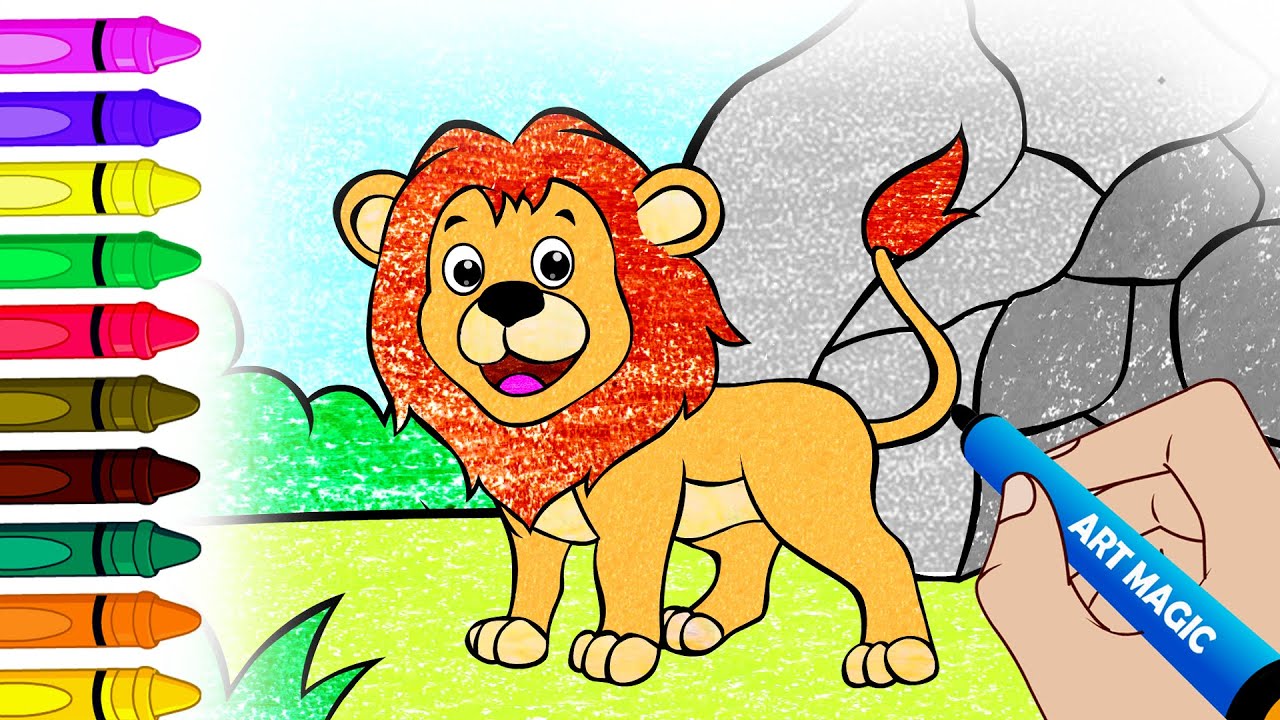
Stepbystep guide to drawing a majestic lion
Sketching the Lion’s Powerful Build
Step 1: Core Shapes – Strength and Mass. Begin with large, powerful shapes to represent the lion’s chest, abdomen, and hindquarters.
Step 2: Limbs – Muscular and Sturdy. Sketch in the limbs, emphasizing their muscularity and sturdiness.
Adding the Mane and Facial Features
Step 1: The Mane – Flowing and Voluminous. The mane is the lion’s most iconic feature. Sketch it in, paying attention to its flow and volume.
Step 2: Facial Features – Intense Gaze. Add the facial features, focusing on the lion’s intense gaze.
Creating Depth with Shading and Highlights
Step 1: Dramatic Lighting. Use dramatic lighting to emphasize the lion’s power and majesty.
Step 2: Texture – Rough and Coarse. Add texture to the fur, suggesting its rough and coarse quality.
This section provides a foundation for drawing mammals. Remember, practice is paramount. The more you draw, the better you’ll become at capturing the unique characteristics of each animal. Don’t be afraid to experiment with different techniques and styles. Kids drawing animals can benefit greatly from these foundational steps, fostering creativity and observation skills. And most importantly, have fun! This is a journey of artistic discovery, and the rewards are immeasurable.
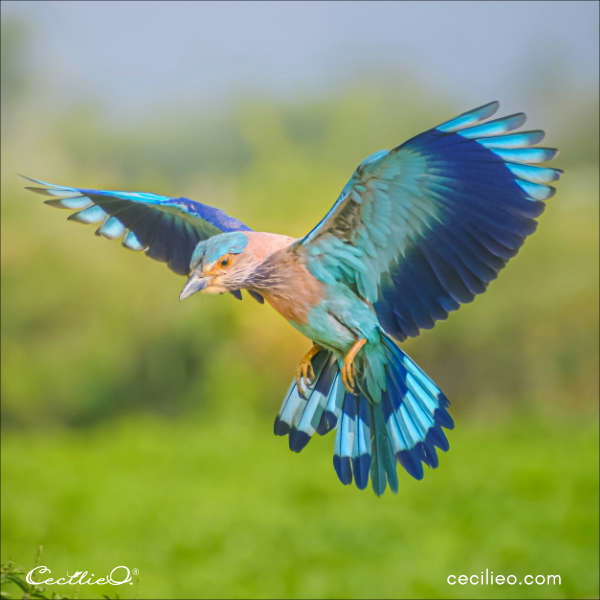
Drawing Birds: Feathers, Beaks, and Wings
This section is dedicated to bringing the beauty and grace of birds to your sketchbook. Birds present a unique set of challenges for artists, primarily due to their feathers, complex wing structures, and often, their dynamic poses. We’ll break down the process into manageable steps, starting with a simple bird in flight and then moving onto the more detailed and captivating perched owl. Remember, the key to success in how to drawing animals, especially birds, is understanding the underlying structure before adding the intricate details. Don’t be afraid to make mistakes – each attempt is a learning opportunity!
Drawing a Simple Bird in Flight
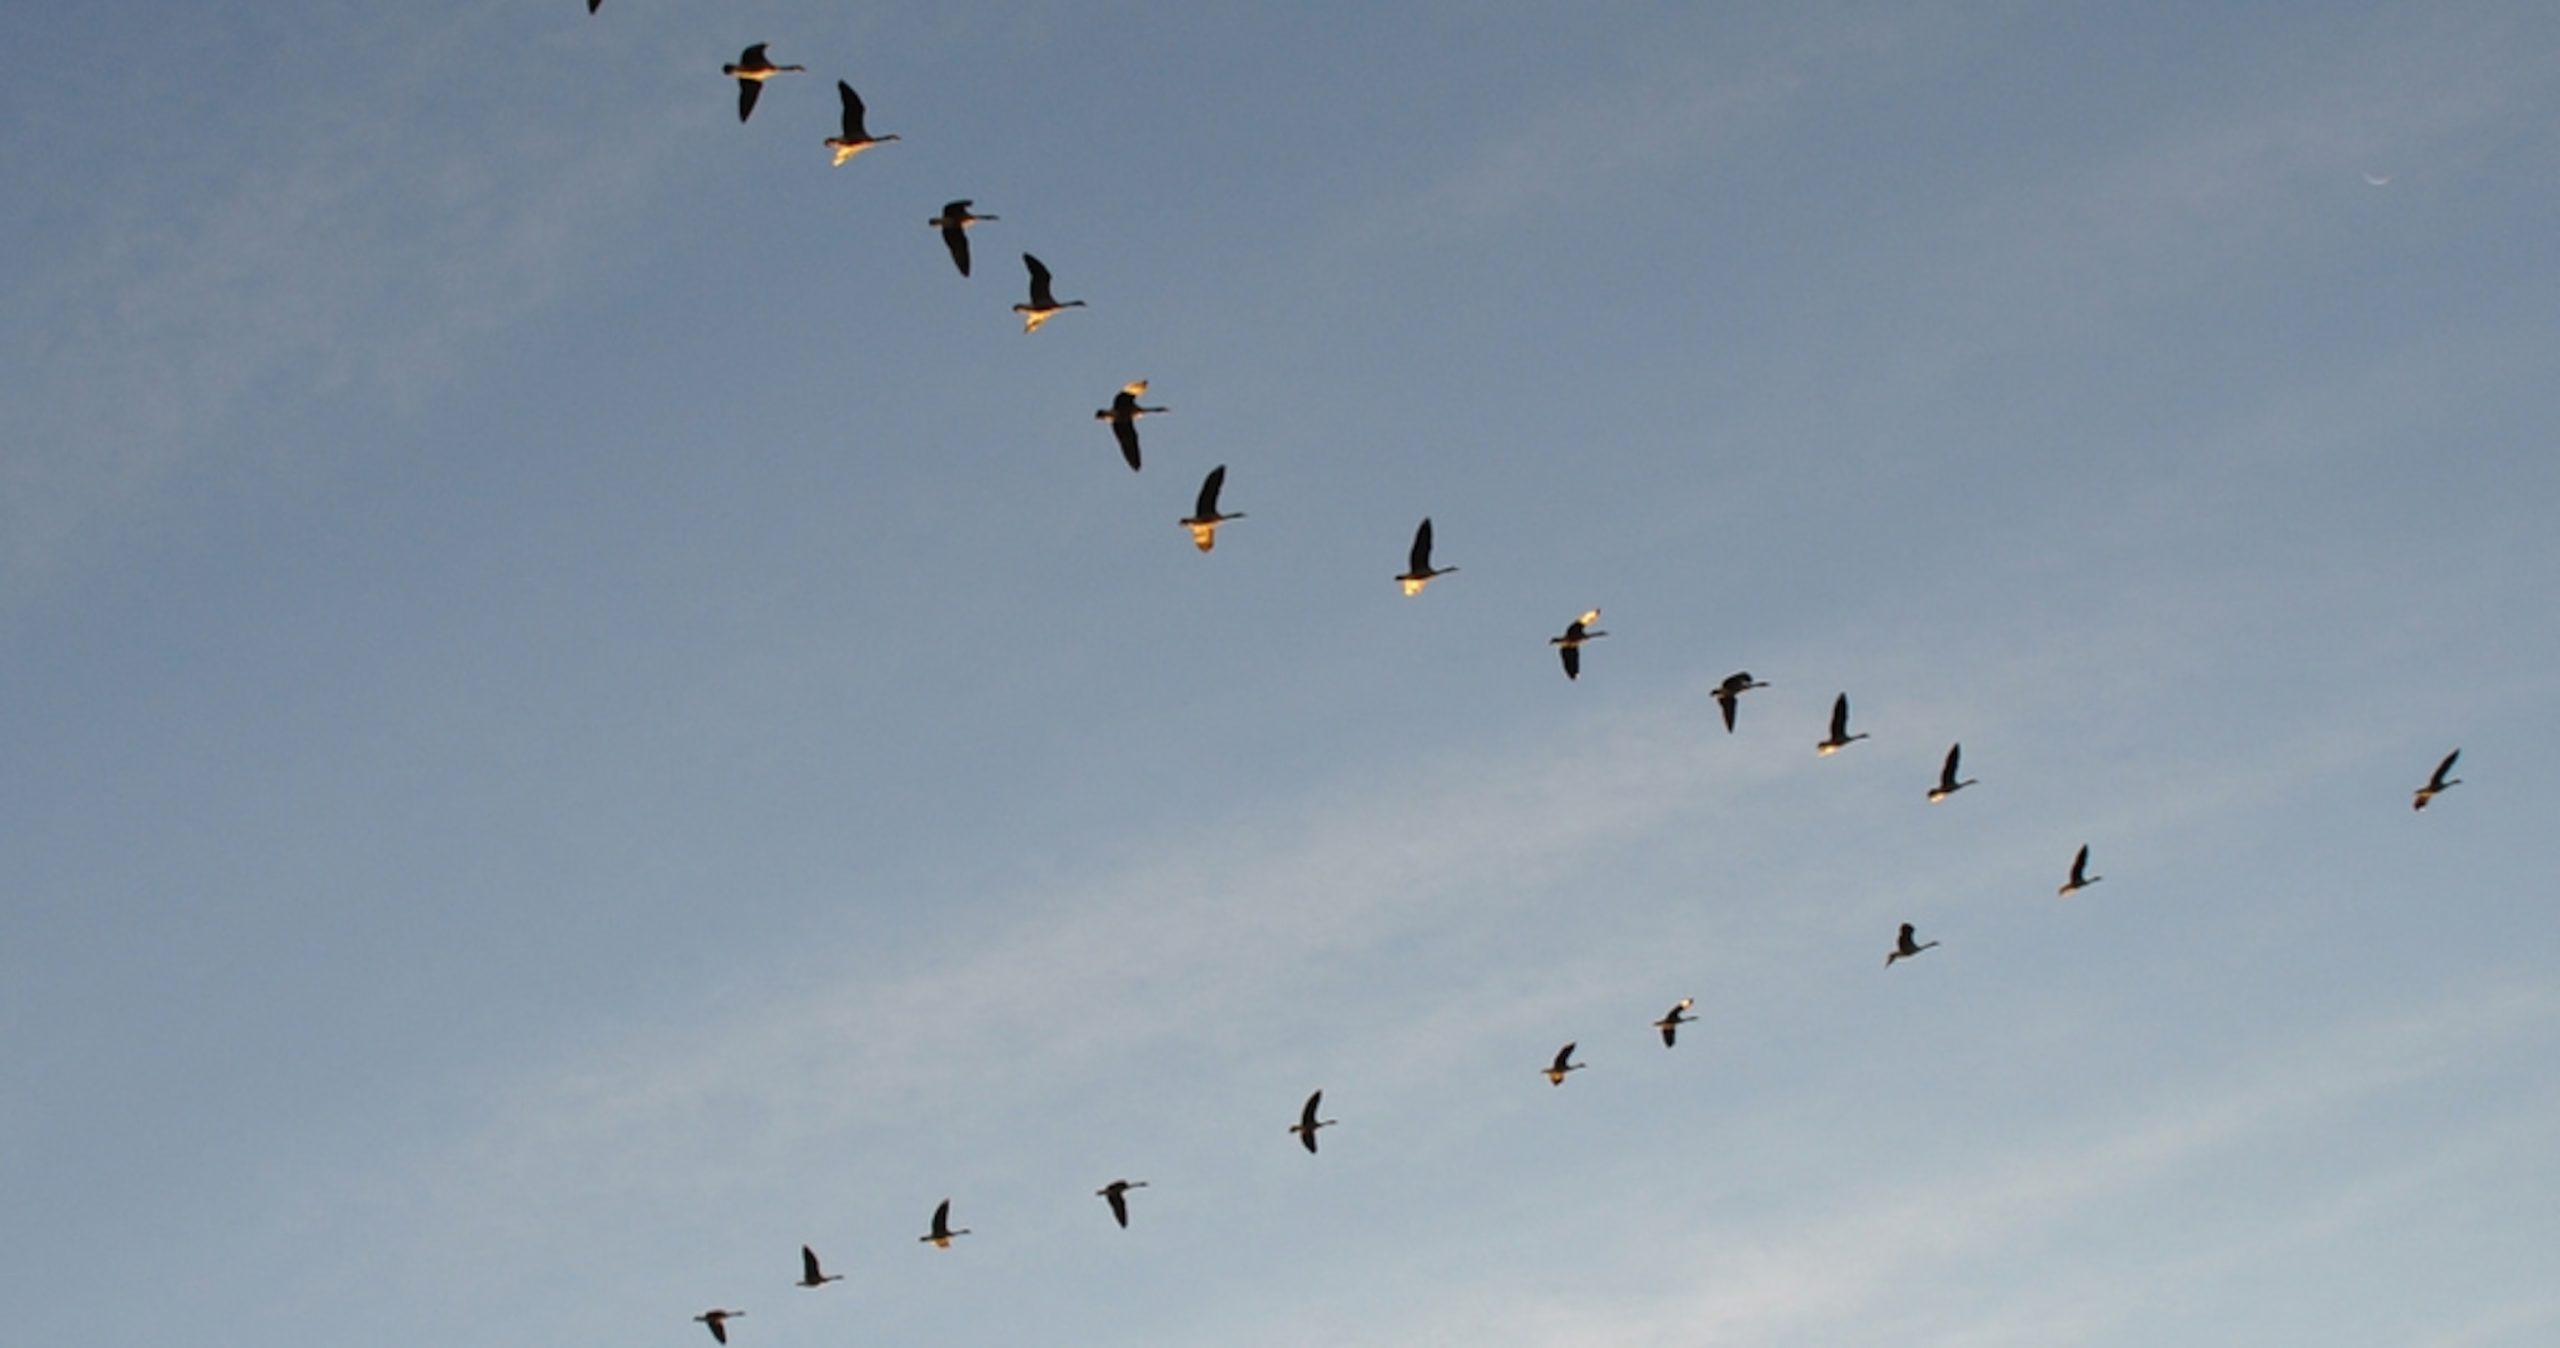
Let’s begin with a bird soaring through the air. This is a fantastic exercise in capturing movement and understanding how wings function. Forget about intricate feather details for now; we’re focusing on the overall form and energy.
- Gesture Drawing: Start with a quick gesture drawing. This is a loose, flowing sketch that captures the bird’s action line – the line that best represents the direction of its movement. Think about the curve of its flight path. Use a light touch with your pencil. Imagine the bird is a flowing ribbon in the wind.
Quick gesture drawing capturing the birds movement - Basic Shapes: Build upon the gesture drawing with basic shapes. The body can be represented by an oval, slightly elongated. The head is a smaller circle or oval. Don’t worry about perfect circles; slightly irregular shapes will make the bird look more natural. Consider the angle of the body – is the bird banking, diving, or flying straight?
Building the birds form with simple ovals and circles - Wing Structure: Wings are arguably the most challenging part. Think of the wing as an extension of the bird’s body. Start with a simple triangular shape for each wing. The wings aren’t flat; they have a slight curve. Pay attention to the angle of the wings – are they fully extended, partially folded, or flapping? The position of the wings dictates the bird’s stage of flight.
Sketching the basic wing structure with triangular shapes - Connecting the Forms: Smoothly connect the shapes. Refine the body shape, making it more streamlined. Add a small triangle for the beak and indicate the tail feathers with a few simple lines. At this stage, the drawing should still be quite loose and sketchy.
Connecting the basic shapes to create a more defined form - Refining the Silhouette: Now, refine the silhouette of the bird. Pay attention to the curves and angles. Erase any unnecessary construction lines. This is where you start to define the bird’s overall shape and personality.
Refining the birds outline for a cleaner look
Establishing the Bird’s Dynamic Pose
A static bird is a boring bird! To make your drawing truly come alive, you need to capture a dynamic pose. This means showing the bird in action – flapping its wings, turning its head, or adjusting its flight path.
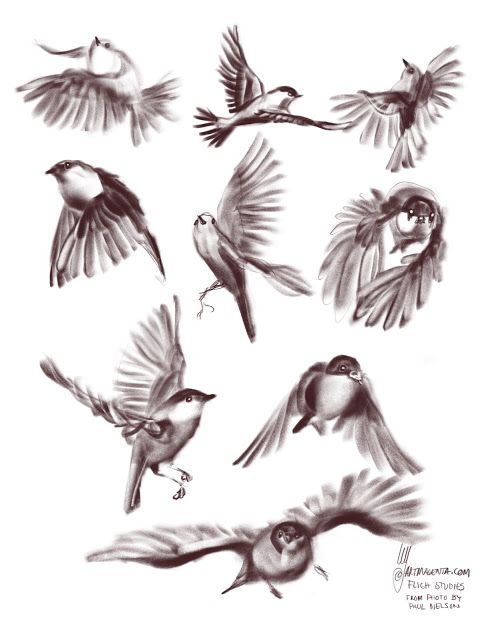
- Reference Images: Use reference images! Look at photos or videos of birds in flight. Pay attention to how they hold their bodies, how their wings move, and how their tails act as rudders. Understanding the mechanics of flight will greatly improve your drawings.
Collection of reference photos showing various bird flight poses - Line of Action: Revisit the concept of the line of action. This is the imaginary line that runs through the center of the bird’s body and represents the direction of its movement. A strong line of action will make the pose feel more energetic and believable.
- Weight Distribution: Consider the bird’s weight distribution. Where is its center of gravity? How is it balancing itself in the air? This will influence the angle of its body and the position of its wings.
- Exaggeration (Subtly): Don’t be afraid to slightly exaggerate the pose to make it more dramatic. However, be careful not to overdo it – you still want the pose to look natural and believable. A slight arch in the back or a more pronounced wing angle can add a lot of energy to the drawing.
- Practice Different Poses: Practice drawing the bird in different poses – soaring, diving, turning, landing. Each pose will require a different approach to the line of action and weight distribution. This is where consistent practice truly pays off.
Detailing the Wings and Feathers
Now for the fun part – adding the feathers! This is where your drawing will really start to come to life. But don’t try to draw every single feather individually. That would be incredibly time-consuming and would likely result in a cluttered and unrealistic drawing.
- Feather Groups: Think of feathers as growing in groups or layers. Start by sketching in the overall shape of each wing, then add layers of feathers on top of that. Don’t focus on individual feather details yet.
- Feather Direction: Pay attention to the direction of the feathers. Feathers generally follow the contours of the wing. They also overlap each other, creating a layered effect.
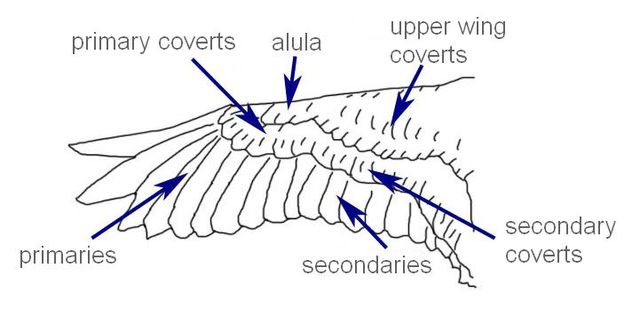
- Primary, Secondary, and Tertiary Feathers: Learn the basic anatomy of the wing. The primary feathers are the longest feathers at the tip of the wing, responsible for thrust. The secondary feathers are shorter and provide lift. The tertiary feathers are closest to the body and help to streamline the wing. Understanding these different types of feathers will help you to draw them more accurately.
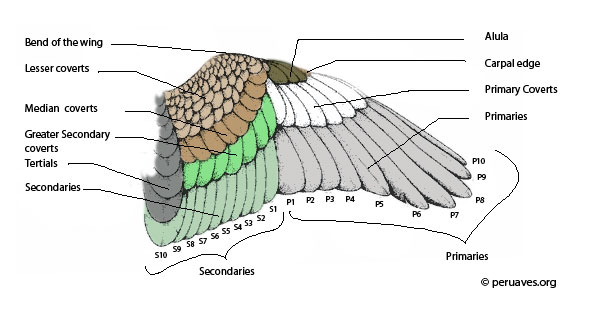
Diagram showing the different types of feathers on a birds wing - Suggesting Texture: Use different line weights and shading techniques to suggest texture. Darker lines and shading can be used to indicate areas of shadow and depth. Lighter lines can be used to suggest the delicate texture of the feathers.
- Simplify, Simplify, Simplify: Remember to simplify. You don’t need to draw every single feather. Focus on the overall pattern and texture. Let the viewer’s eye fill in the details.
Adding Color and Background Elements
Color can dramatically enhance your bird drawing. Consider the bird’s natural plumage and choose colors that are appropriate for its species. Adding a background can also help to create a sense of context and atmosphere.
- Color Palette: Choose a color palette that complements the bird’s plumage. Consider using a limited palette to create a more harmonious look.
- Color Application: Experiment with different color application techniques. You can use watercolor, colored pencils, or digital painting software. Layering colors can create depth and richness.
- Background: A simple background can add a lot to your drawing. Consider adding a sky, clouds, trees, or water. Keep the background relatively simple so that it doesn’t distract from the bird.
Bird in flight with a vibrant sky and cloud background - Light and Shadow: Pay attention to light and shadow. This will help to create a sense of depth and realism. Consider the direction of the light source and how it affects the bird and its surroundings.
- Atmospheric Perspective: Use atmospheric perspective to create a sense of distance. Objects in the distance should be lighter in color and less detailed than objects in the foreground.
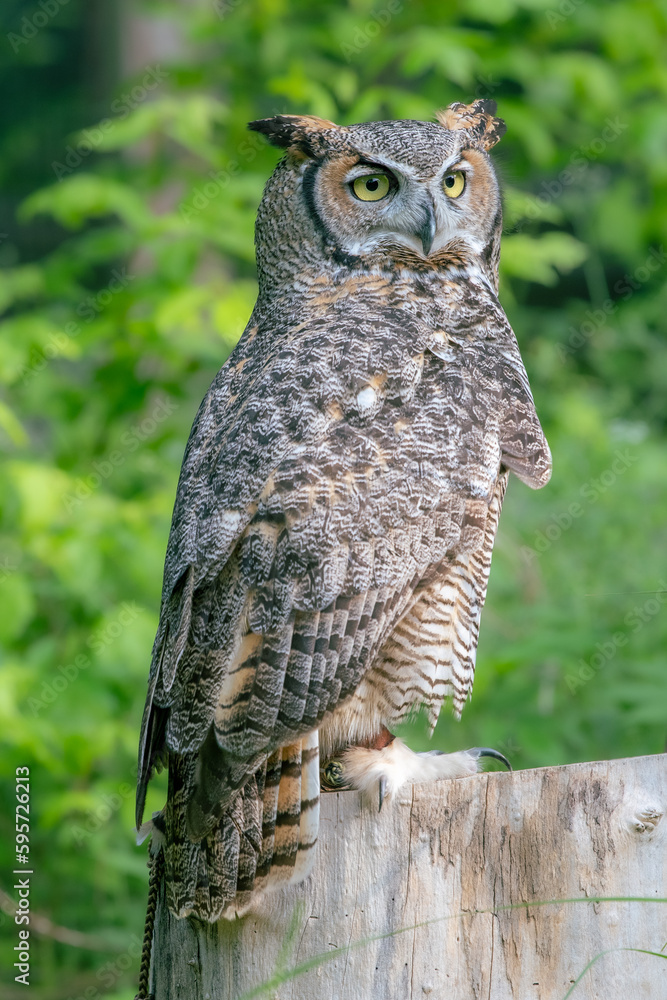
Drawing a Perched Owl
Now, let’s shift our focus to a more static pose – a perched owl. Owls are fascinating creatures with distinctive features, making them a rewarding subject for artists.
- Basic Form and Proportions: Start with a simplified form. Owls have a relatively large head compared to their body. Use ovals and circles to block in the head, body, and legs. Pay attention to the proportions – the legs are often hidden beneath the feathers, but they are surprisingly long.
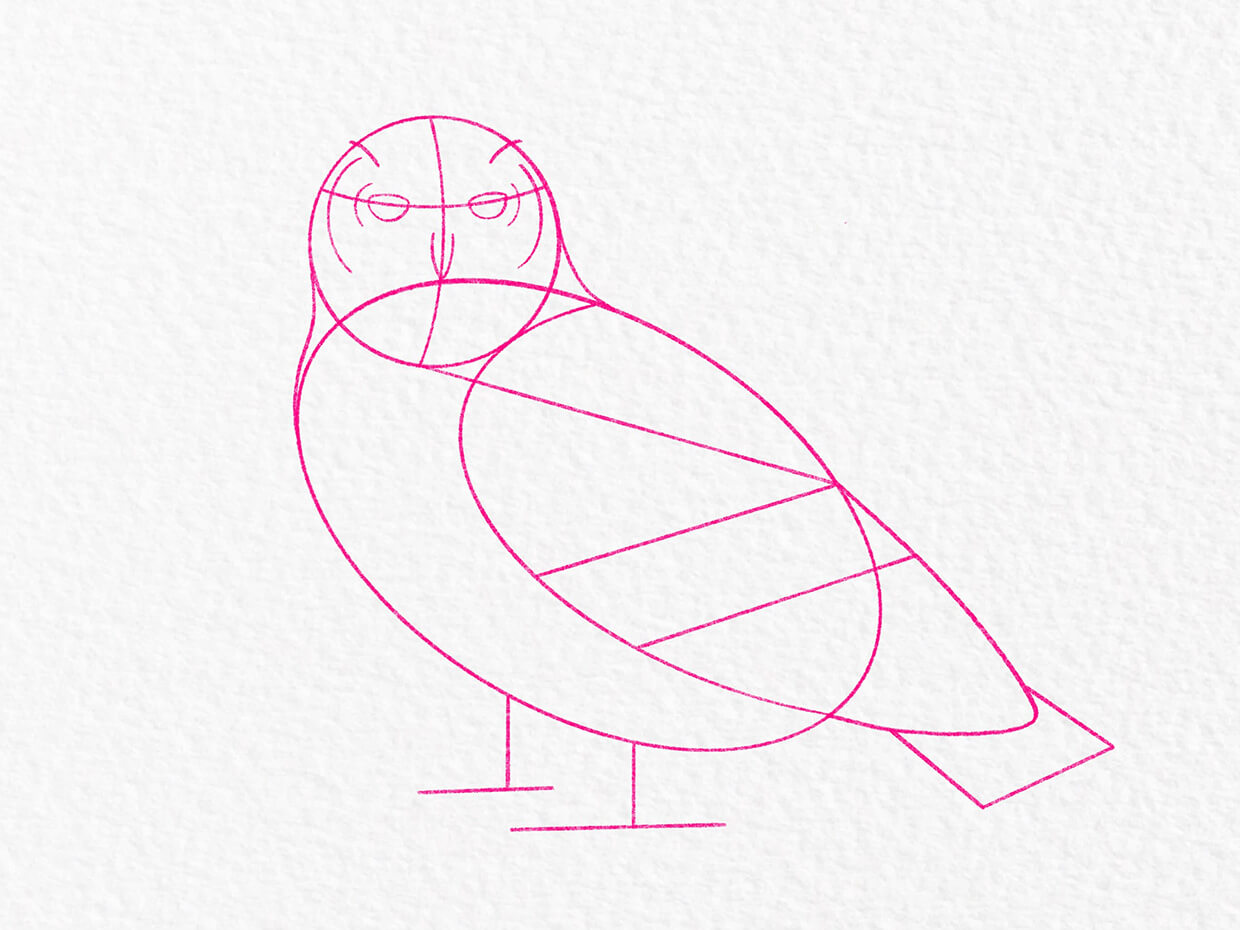
Blocking in the owls form with basic shapes - Constructing the Head: The owl’s head is its most striking feature. Sketch a large circle for the head and then add a smaller circle for the facial disc. The facial disc is the area around the eyes and beak that helps the owl to funnel sound.
- Focusing on the Owl’s Distinctive Eyes: Owls have large, forward-facing eyes that give them excellent binocular vision. Draw the eyes as large circles, positioned prominently on the face. Pay attention to the shape of the eyelids and the surrounding feathers. The eyes are often a striking color, so consider using a vibrant hue.
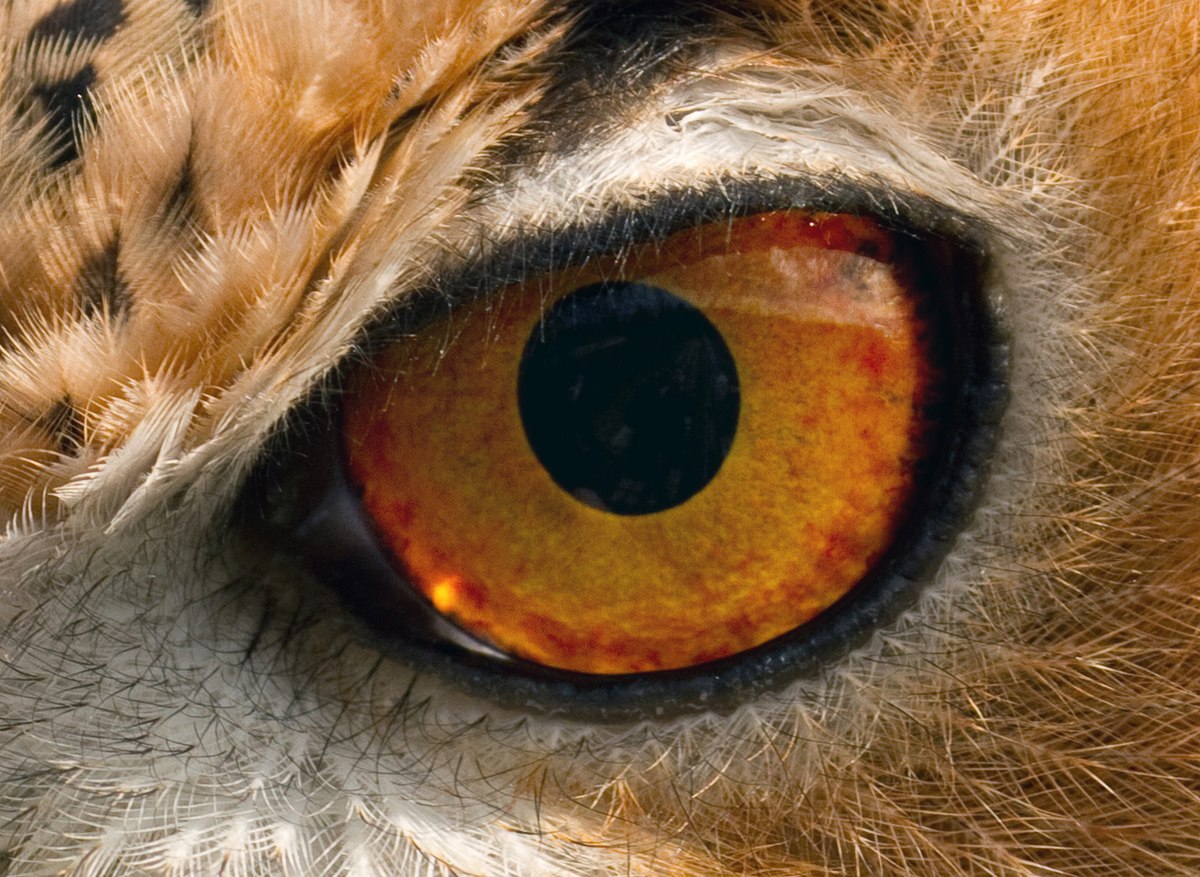
Detailed sketch of an owls eyes - Beak and Facial Feathers: Sketch the beak as a small, hooked shape. Add the facial feathers, which are arranged in a distinctive pattern around the beak and eyes. These feathers help the owl to detect prey.
Rendering Feathers and Textures
- Layering Feathers: Similar to the bird in flight, think of feathers in layers. Start with the larger feather groups and then add smaller details.
- Different Feather Types: Owls have different types of feathers – fluffy down feathers for insulation and stiffer contour feathers for flight and camouflage. Use different line weights and shading techniques to represent these different textures.
- Shading and Highlights: Use shading to create depth and volume. Pay attention to the direction of the light source and how it affects the feathers. Add highlights to create a sense of sheen.
Rendering the owls feathers with shading and highlights - Camouflage Patterns: Many owls have intricate camouflage patterns on their feathers. Use a variety of colors and textures to recreate these patterns.
- Perch Details: Don’t forget to add details to the perch. A branch, a rock, or a fence post can add context and interest to your drawing. Consider the texture of the perch – is it rough and weathered or smooth and polished?
Remember, how to drawing animals takes practice. Don’t be discouraged if your first attempts aren’t perfect. Keep sketching, keep observing, and keep learning. The more you practice, the better you will become at capturing the beauty and grace of birds on paper. And most importantly, have fun! Kids drawing animals can also benefit from these techniques, simplifying the steps and focusing on the joy of creation.
Drawing Reptiles & Amphibians: Scales and Skin
This section dives into the fascinating world of reptiles and amphibians, creatures often overlooked in beginner drawing guides but brimming with unique textures and forms. The key to successfully drawing these animals lies in understanding and replicating their distinctive scales, skin patterns, and anatomical structures. We’ll focus on two iconic examples: the serene green turtle and the vibrant colorful lizard. This isn’t just about copying what you see; it’s about understanding how their bodies are constructed and how light interacts with their surfaces. Learning to draw these creatures will significantly enhance your skills in texture rendering and form building, skills applicable to drawing a wide range of subjects. Remember, patience is key! These details take time and practice. Don’t be afraid to experiment and embrace imperfections – they often add character. This is a great area to practice how to drawing animals with a focus on detail.
Drawing a Green Turtle
The green turtle, a majestic inhabitant of our oceans, presents a unique drawing challenge due to its shell and the interplay of hard and soft tissues. We’ll break down the process into manageable steps, starting with the foundational structure. Think of the turtle not as a single, solid object, but as a collection of interconnected shapes.
1. Establishing the Basic Form: Begin with a large oval for the turtle’s body. This oval doesn’t need to be perfect; it’s a guide. Lightly sketch a smaller oval overlapping the larger one, representing the plastron (the underside of the shell). Connect these two ovals with curved lines, forming the basic shape of the shell. Don’t worry about details yet; focus on getting the proportions right. Consider the turtle’s pose – is it swimming, resting on land, or emerging from the water? This will influence the angle and curvature of the shell.
2. Building the Turtle’s Shell: This is where things get interesting. The turtle’s shell isn’t a smooth dome; it’s composed of individual scutes (plates). Lightly sketch a grid pattern on top of the shell’s outline. These lines will serve as guides for drawing the individual scutes. Vary the size and shape of the scutes to create a more natural look. Remember that scutes aren’t perfectly symmetrical. Pay attention to the central scutes, which are often larger and more prominent.
3. Adding the Head, Legs, and Tail: Sketch the head extending from the front of the shell. The head is relatively small compared to the body. Keep it streamlined and slightly flattened. Add the legs, which are paddle-like and adapted for swimming. The front legs are typically larger and more powerful than the hind legs. Sketch the tail, which is relatively short and stubby. Again, focus on basic shapes and proportions at this stage. Think of the legs as extensions of the body, flowing naturally from the shell.
4. Texturing the Shell and Skin: Now comes the fun part – adding texture! For the shell, use short, curved lines to define the edges of each scute. Vary the pressure of your pencil to create highlights and shadows. Add subtle cracks and imperfections to make the shell look more realistic. For the skin, use a combination of short, smooth strokes and stippling (dots) to create a slightly bumpy texture. Pay attention to the areas around the neck and legs, where the skin is more wrinkled and flexible. Consider the light source and how it affects the shadows on the shell and skin. This is where understanding value becomes crucial. Darker values create depth and form, while lighter values suggest highlights and reflections. This is a great exercise in how to drawing animals with complex textures.
Drawing a Colorful Lizard
Lizards, with their dynamic poses and vibrant colors, offer a different set of drawing challenges. Their bodies are more flexible and their skin is covered in intricate scales. We’ll focus on capturing their agility and the beauty of their scale patterns.

A vibrant gecko clinging to a branch in a lush tropical environment
1. Sketching the Lizard’s Body and Limbs: Start with a long, curved line representing the lizard’s spine. This line will define the overall pose and direction of the body. Add a smaller oval for the head and a slightly larger oval for the torso. Connect these ovals with smooth, flowing lines. Sketch the limbs, paying attention to their articulation and flexibility. Lizards have five toes on each foot, so be sure to include those details. Think about the lizard’s movement – is it running, climbing, or basking in the sun? This will influence the position of its limbs and tail.
2. Detailing the Scales and Patterns: This is where the lizard truly comes to life. Lizards have a wide variety of scale patterns, so research the specific species you’re drawing. Use a fine-tipped pen or pencil to draw the individual scales. Start with the larger scales and then add the smaller ones in between. Vary the size, shape, and orientation of the scales to create a more natural look. Pay attention to the areas around the eyes, mouth, and limbs, where the scales are often smaller and more tightly packed. Don’t be afraid to experiment with different patterns and textures. Some lizards have stripes, spots, or other markings that add to their visual appeal. This is a fantastic way to practice kids drawing animals with intricate details.
3. Adding Highlights and Shadows: Once you’ve finished drawing the scales, it’s time to add highlights and shadows. Use a combination of hatching, cross-hatching, and stippling to create depth and form. Pay attention to the light source and how it affects the shadows on the lizard’s body. Highlight the areas that are directly facing the light and shade the areas that are hidden from view. Use darker values to emphasize the contours of the body and the texture of the scales. Consider adding a subtle gradient to the scales to create a sense of volume. Remember, the key to realistic shading is to observe carefully and replicate what you see. This is a crucial step in mastering how to drawing animals realistically.
4. Capturing the Lizard’s Personality: Don’t forget the eyes! Lizard eyes are often small and beady, but they can convey a lot of personality. Add a small highlight to each eye to make it sparkle. Pay attention to the shape of the mouth and the position of the head. These details can help you capture the lizard’s mood and expression. Consider adding a background element, such as a rock or a plant, to provide context and enhance the overall composition. Remember, drawing is about more than just replicating what you see; it’s about conveying your own interpretation and artistic vision. This section is designed to help you improve your skills in drawing animals and appreciate the beauty of the natural world.
This detailed breakdown should provide a solid foundation for drawing reptiles and amphibians. Remember to practice regularly and don’t be afraid to experiment with different techniques and styles. The more you draw, the more confident and skilled you will become. And most importantly, have fun!
Drawing Wild Animals: Bringing the Safari to Life
This section is all about capturing the majesty and power of some of the most iconic animals on Earth. We’ll be focusing on two incredible creatures: the elephant and the giraffe. These animals present unique challenges and opportunities for artists, from rendering massive scale to depicting intricate patterns. The goal isn’t just to copy what you see, but to understand the underlying structure and personality of these magnificent beings. This is where the real fun of how to drawing animals begins! We’ll break down each animal into manageable steps, focusing on building form, adding detail, and bringing them to life on the page. Remember, patience and observation are key. Don’t be afraid to make mistakes – they are part of the learning process.
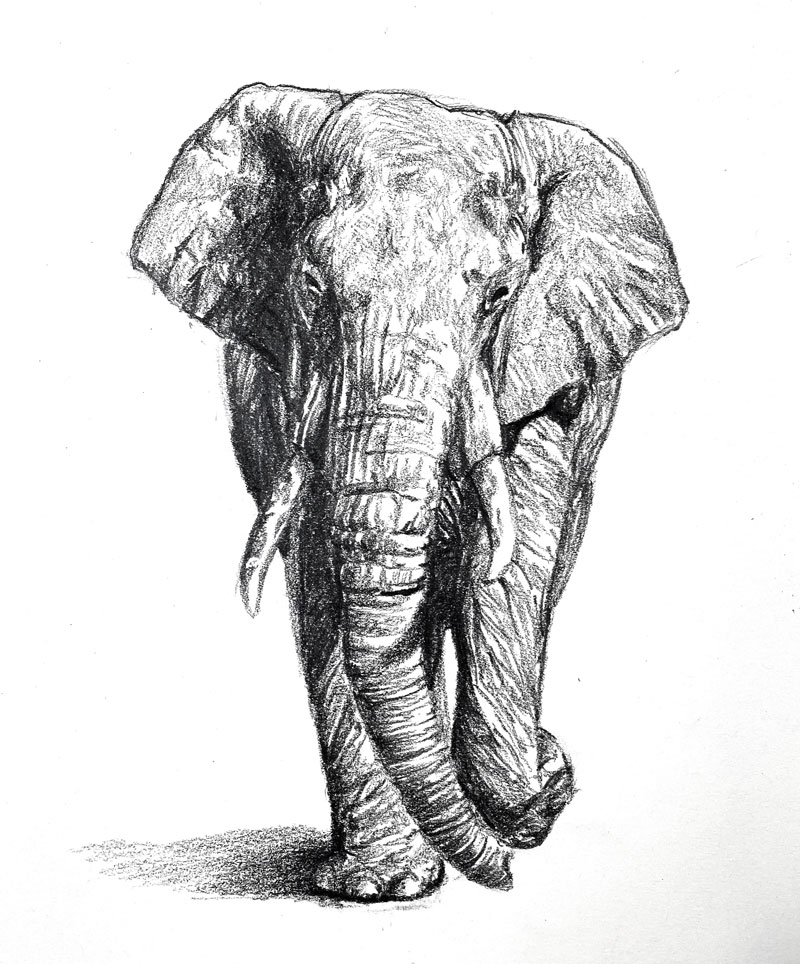
Drawing an Elephant
Elephants are truly awe-inspiring creatures. Their sheer size can be intimidating to draw, but by breaking down the form into simpler shapes, we can make the process much more approachable. We’ll be focusing on the African elephant in this guide, known for its larger ears and more wrinkled skin.
Establishing the Elephant’s Massive Form
The first step is to forget about detail and focus on the overall shape. Start with a large oval for the body. This oval doesn’t need to be perfect; elephants are rarely symmetrical in their natural poses. Think of it as a slightly lumpy bean shape. Below the body oval, sketch a smaller oval for the head. The head is proportionally smaller than the body, but still substantial. Connect the head and body with a curved line representing the neck. Don’t make the neck too thin – elephants have incredibly strong necks to support their weight.
Next, add four thick, pillar-like shapes for the legs. These should be relatively straight, but with a slight bend at the joints. Pay attention to the spacing between the legs; they need to support the weight of the massive body. Finally, lightly sketch in the shape of the trunk, starting from the head and curving downwards. The trunk is a complex structure, so don’t worry about detail at this stage. Just establish its general direction and length.
This initial sketch should look very rough and simplified. That’s okay! It’s a foundation upon which we’ll build. Think of it like the armature for a sculpture. Constantly step back and look at the overall proportions. Is the head too small? Are the legs too short? Adjust as needed. This stage is all about getting the basic structure right. Remember, a strong foundation is crucial for a successful drawing. This is a fundamental step in how to drawing animals effectively.
Detailing the Trunk, Ears, and Tusks
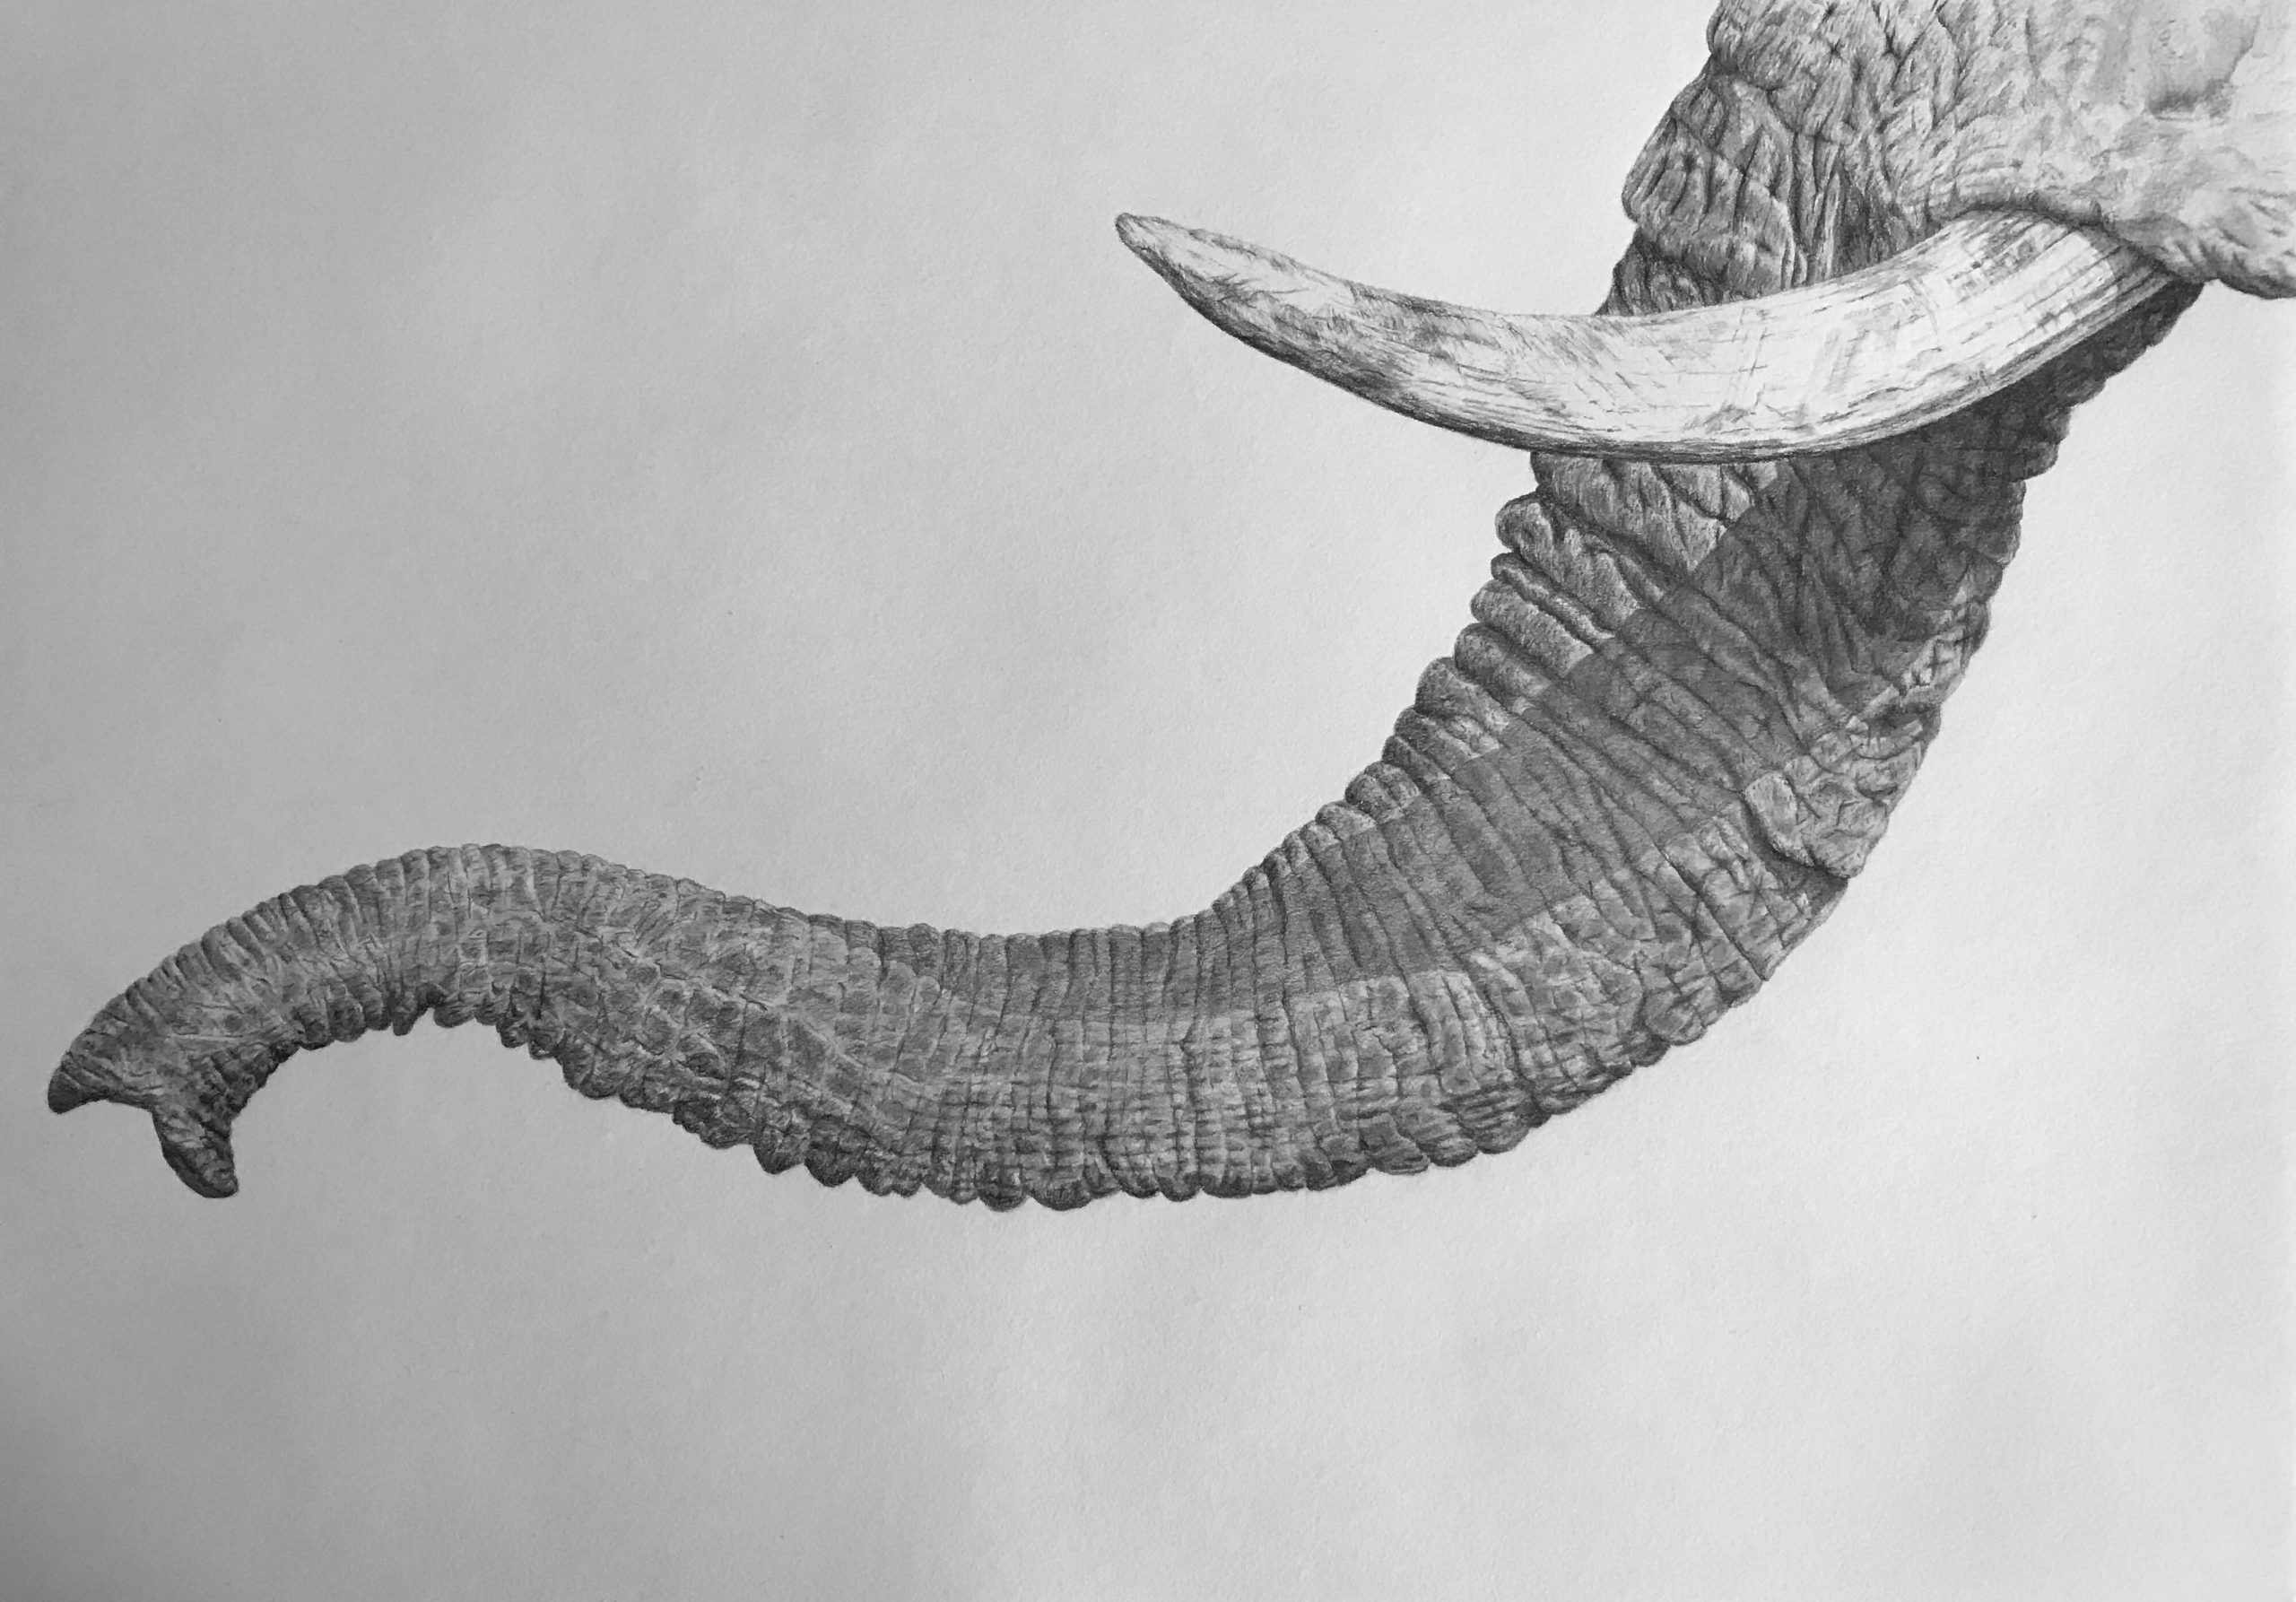
Detailed sketch of an elephants trunk showing wrinkles and texture
Now that we have the basic form established, we can start adding detail. Let’s begin with the trunk. The trunk is incredibly flexible and muscular, so it’s rarely straight. Sketch in the curves and bends, paying attention to how it tapers towards the end. Add wrinkles and folds to suggest the texture of the skin. Elephants use their trunks for a variety of tasks – breathing, smelling, drinking, and grasping – so the shape will vary depending on what the elephant is doing.
Next, focus on the ears. African elephants have very large, fan-shaped ears. Sketch the outline of the ears, paying attention to their shape and size. The ears are not perfectly symmetrical, so feel free to vary the shape slightly. Add veins and wrinkles to the ears to suggest their texture.
Finally, add the tusks. Tusks are elongated incisor teeth made of ivory. They curve outwards and upwards from the mouth. Sketch the shape of the tusks, paying attention to their curve and length. Add highlights to the tusks to suggest their smooth, polished surface.
Don’t be afraid to use reference photos at this stage. Studying real elephant anatomy will help you understand the structure and form of these features. Pay attention to how the trunk connects to the head, how the ears attach to the sides of the head, and how the tusks emerge from the mouth.
Adding Texture and Shading
Elephant drawing with detailed shading and texture to create a realistic appearance
To bring your elephant drawing to life, you need to add texture and shading. Elephants have thick, wrinkled skin, so texture is crucial. Use short, broken lines to suggest the wrinkles and folds. Vary the pressure of your pencil to create different tones. Darker tones will emphasize the shadows and create a sense of depth.
Start by establishing the light source. Where is the light coming from? This will determine where the shadows fall. Use a soft pencil to lightly shade the areas that are in shadow. Gradually build up the tones, adding darker shades to the deeper shadows.
Pay attention to the form of the elephant. The shading should follow the contours of the body, emphasizing the curves and muscles. Use cross-hatching to create texture and depth. Cross-hatching involves drawing a series of intersecting lines. The closer the lines are together, the darker the tone.
Don’t forget to add highlights. Highlights are the areas where the light is hitting the surface directly. Use a kneaded eraser to lift the graphite and create highlights. This will make the elephant look more three-dimensional and realistic.
Remember to observe real elephant skin closely. Notice how the wrinkles are not random; they follow the underlying muscle structure. This attention to detail will elevate your drawing and make it more believable. This is a key element in mastering kids drawing animals and beyond.
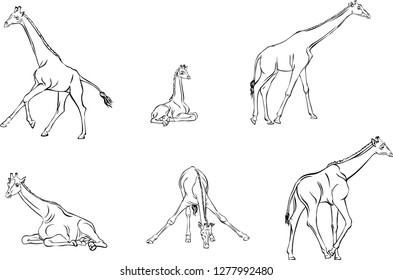
Drawing a Giraffe
Giraffes, with their incredibly long necks and distinctive spotted patterns, are another iconic safari animal. Drawing a giraffe requires a slightly different approach than drawing an elephant, focusing on elegance and proportion.
Constructing the Giraffe’s Long Neck and Legs
The most challenging aspect of drawing a giraffe is its long neck. Start by sketching a long, curved line for the neck. This line should be slightly S-shaped, as a giraffe’s neck is not perfectly straight. At the top of the neck, sketch a small oval for the head. The head is proportionally small compared to the neck and body.
Below the neck, sketch a large oval for the body. The body is relatively slender and streamlined. Add four long, thin legs to the body. The legs are proportionally long and slender, but they need to be strong enough to support the giraffe’s weight. Pay attention to the joints in the legs; they should be slightly bent to suggest movement.
Finally, lightly sketch in the shape of the tail. The tail is relatively short and ends in a tuft of hair.
Again, this initial sketch should be very rough and simplified. Focus on getting the proportions right. Is the neck too long or too short? Are the legs too thin? Adjust as needed.
Adding Spots and Facial Features
Detailed sketch of giraffe spots and facial features
Once you have the basic form established, you can start adding detail. The most distinctive feature of a giraffe is its spotted pattern. The spots are irregular in shape and size, and they vary in color from light brown to dark brown.
Start by lightly sketching in the outline of the spots. Don’t try to be too precise; the spots are naturally irregular. Then, fill in the spots with a darker tone. Vary the pressure of your pencil to create different shades.
Next, focus on the facial features. Giraffes have large, expressive eyes and small, rounded ears. Sketch the shape of the eyes and ears, paying attention to their placement on the head. Add details such as eyelashes and pupils.
Giraffes also have small horns called ossicones. These are covered in skin and fur. Sketch the shape of the ossicones, paying attention to their size and placement on the head.
Creating a Natural-Looking Pose
Giraffe drawing in a natural walking pose with shading and detail
To make your giraffe drawing look more realistic, it’s important to create a natural-looking pose. Giraffes are graceful and elegant animals, so their poses should reflect this.
Study reference photos of giraffes in different poses. Pay attention to how they move their legs and necks. Notice how they hold their heads and tails.
When drawing the pose, think about the weight distribution. Where is the giraffe putting its weight? This will affect the way the legs are bent and the way the body is positioned.
Don’t be afraid to experiment with different poses. Try drawing the giraffe walking, running, or eating. The more you practice, the better you’ll become at capturing the natural movement of this magnificent animal. This is a crucial skill for anyone interested in how to drawing animals with realism and grace.
Beyond the Basics: Developing Your Animal Art
This section is for those who’ve diligently followed the previous steps, successfully drawing dogs, cats, lions, birds, and reptiles. You’ve grasped the fundamentals of shape construction, shading, and texture. Now, it’s time to move beyond simply reproducing what you see and start creating animals with a deeper understanding and a more personal style. This isn’t about abandoning the techniques we’ve learned; it’s about building upon them, adding layers of knowledge and artistic expression. We’ll delve into the fascinating world of animal anatomy, explore the power of dynamic poses and perspectives, and finally, unleash your creativity by experimenting with various art styles. This is where the journey truly becomes your own.
Understanding Animal Anatomy
Let’s be honest, drawing animals convincingly isn’t just about making them look right; it’s about understanding why they look the way they do. This is where animal anatomy comes in. You don’t need to become a veterinarian, but a basic grasp of skeletal and muscular structures will dramatically improve your artwork. Think of it like building a house – you can’t just slap walls together; you need a solid foundation. The skeleton is your foundation.
Start with the basics: the spine. Notice how it curves differently in different animals. A cat’s spine is incredibly flexible, allowing for graceful, sinuous movements. A dog’s spine is more robust, built for running and endurance. A lion’s spine is powerful, supporting a large head and muscular body. Understanding these differences will translate into more believable poses.
Next, consider the limbs. Pay attention to the joints – where bones connect. The placement and range of motion of these joints dictate how an animal moves. For example, a horse’s leg joints allow for a long stride, while a frog’s legs are designed for jumping. Observe how muscles attach to bones. Muscles aren’t just smooth shapes; they have specific origins and insertions. Knowing this will help you render form and volume more accurately.
Resources for Studying Anatomy:
- Online Anatomy References: Websites like Anatomy 360 (https://anatomy360.info/) offer detailed 3D models of animal skeletons and muscles.
- Animal Anatomy Books: Look for books specifically focused on animal anatomy for artists. “Animal Anatomy for Artists: The Elements of Form” by Eliot Goldfinger is a classic.
- Zoo Visits & Observation: The best way to learn is to observe animals in person. Sketch them at the zoo, paying attention to their movements and how their muscles flex. Even looking at photos and videos can be incredibly helpful.
- Ecorche Studies: An ecorche is a study of an animal’s musculature with the skin removed. While it sounds gruesome, it’s an incredibly effective way to understand the underlying structure. Start with simplified ecorche drawings before attempting more detailed ones.
Don’t be intimidated! Start small. Focus on one animal at a time. Begin with the skeleton, then add the major muscle groups. Gradually build your knowledge. The more you understand the underlying structure, the more confident and accurate your drawings will become. This understanding is crucial for anyone serious about how to drawing animals effectively.
Practicing Different Poses and Perspectives
Once you have a basic understanding of animal anatomy, it’s time to put that knowledge into practice by exploring different poses and perspectives. Sticking to the same few poses will make your artwork feel static and predictable. Animals are constantly moving, interacting with their environment, and expressing themselves through body language. Capturing this dynamism is key to creating compelling artwork.
A collection of dynamic animal pose sketches showcasing a lion running a bird flying and a cat stretching
Techniques for Practicing Poses:
- Gesture Drawing: This is a quick, loose sketching technique that focuses on capturing the essence of a pose. Don’t worry about details; focus on the flow of the line and the overall energy of the animal. Set a timer for 30 seconds to 2 minutes per pose.
- Reference Photos: Gather a large collection of reference photos showing animals in various poses. Pay attention to how their weight is distributed, how their limbs are positioned, and how their bodies curve.
- Action Lines: Draw a line of action through the animal’s body to indicate the direction of movement. This will help you create a more dynamic and believable pose.
- Perspective Studies: Don’t limit yourself to drawing animals from a single viewpoint. Experiment with different perspectives – from above, below, and at eye level. This will add depth and dimension to your artwork. Consider using one, two, and three-point perspective to create realistic scenes.
- Storytelling Through Pose: Think about what the animal is doing and why. Is it hunting, playing, resting, or defending itself? The pose should reflect the animal’s mood and intention.
Perspective Challenges:
- Foreshortening: This is the technique of depicting an object or body part as shorter than it actually is because it’s angled towards the viewer. Foreshortening can be challenging, but it’s essential for creating a sense of depth and realism.
- Overlapping Forms: When drawing multiple animals or objects, overlap them to create a sense of depth. The objects that are closer to the viewer should overlap those that are further away.
- Atmospheric Perspective: Use lighter values and less detail for objects that are further away to create a sense of distance.
Remember, practice makes perfect. The more you experiment with different poses and perspectives, the more comfortable and confident you’ll become. This is a crucial step in mastering how to drawing animals with impact and realism. Don’t be afraid to make mistakes; they are valuable learning opportunities.
Experimenting with Various Art Styles
Now for the fun part! You’ve learned the fundamentals of anatomy, posing, and perspective. You’ve built a solid foundation. Now it’s time to break the rules and experiment with various art styles. Don’t feel confined to realism. Explore different techniques, mediums, and approaches to find your own unique voice.
Examples of animal artwork in various styles watercolor pencil realism cartoon and digital painting
Art Styles to Explore:
- Realism: This style aims to depict animals as accurately as possible, with meticulous attention to detail. It requires a strong understanding of anatomy and shading techniques.
- Cartoon: This style simplifies forms and exaggerates features for a playful and expressive effect. It’s often used in kids drawing animals and animation.
- Watercolor: This medium is known for its delicate washes and luminous colors. It’s perfect for capturing the softness of fur or the iridescence of feathers.
- Pencil: A versatile medium that can be used for both realistic and expressive drawings. Experiment with different grades of pencils to create a range of values.
- Digital Painting: This medium offers a wide range of tools and effects. You can create everything from realistic paintings to stylized illustrations.
- Impressionism: Focus on capturing the impression of an animal rather than its precise details. Use loose brushstrokes and vibrant colors.
- Abstract: Break down the animal into its basic shapes and forms. Experiment with color, texture, and composition to create a unique and expressive artwork.
Tips for Experimenting:
- Study the Masters: Look at the work of artists who inspire you. Analyze their techniques and try to incorporate them into your own artwork.
- Mix and Match: Don’t be afraid to combine different styles. For example, you could create a realistic drawing with a cartoon-like color palette.
- Embrace Imperfection: Don’t strive for perfection. Allow yourself to make mistakes and learn from them.
- Find Your Voice: The goal is to develop your own unique style. Experiment until you find a way of drawing animals that feels authentic and expressive.
- Don’t be afraid to try new mediums: Explore charcoal, pastels, ink, or even mixed media.
Ultimately, the most important thing is to have fun and let your creativity flow. This is your artistic journey, and there are no right or wrong answers. By embracing experimentation, you’ll not only improve your skills but also discover a deeper appreciation for the beauty and diversity of the animal kingdom. Remember, learning how to drawing animals is a continuous process of exploration and discovery. Keep practicing, keep experimenting, and keep pushing your boundaries.
Continuing Your Artistic Journey
So, you’ve journeyed through the basics, sketched furry mammals, feathered birds, scaled reptiles, and even majestic safari creatures. You’ve learned to break down complex forms into manageable shapes, understand the importance of light and shadow, and capture the essence of each animal on paper. Congratulations! But the world of drawing animals is vast and endlessly rewarding. This isn’t an ending; it’s a launchpad. This section is about taking those foundational skills and propelling them forward, transforming you from a beginner following steps to an artist with a unique voice and style. It’s about embracing the continuous learning process and finding joy in the exploration.
Deepening Your Understanding of Animal Anatomy
Let’s be honest, even with simplified shapes, a solid grasp of animal anatomy is crucial. It’s the skeleton beneath the fur, the muscle structure that dictates movement, and the underlying framework that gives your drawings weight and believability. You don’t need to become a veterinary anatomist, but understanding the basic skeletal and muscular systems will dramatically improve your work.
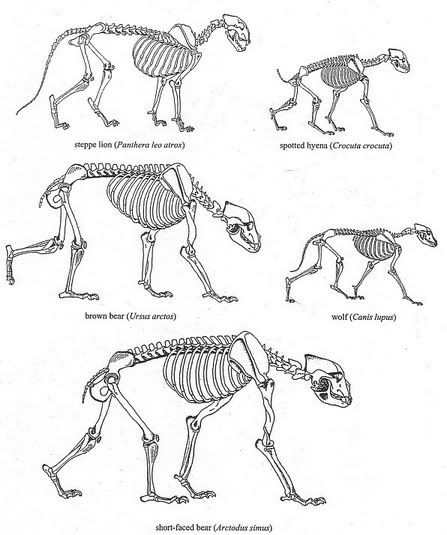
Comparative skeletal structures of a dog cat and lion highlighting key differences
Start with the animals you enjoy drawing most. For example, if you love drawing dogs, research the canine skeletal structure. Pay attention to the proportions – the length of the legs relative to the body, the shape of the ribcage, the placement of the shoulder blades. Notice how the muscles attach to the bones and influence the surface form. There are fantastic resources available online, including anatomical diagrams, 3D models, and even videos of animals moving. Websites like Anatomy 360 and books dedicated to animal anatomy for artists are invaluable.
Don’t just look at the anatomy; draw it. Sketch simplified skeletal structures, then build muscle layers on top. This exercise forces you to internalize the information and understand how the anatomy translates to the surface form. Think about how different breeds of dogs have different skeletal structures, leading to variations in their appearance and movement. A dachshund’s elongated spine versus a bulldog’s stocky build are prime examples. This understanding will allow you to draw a wider variety of animals with greater accuracy and confidence. It’s also incredibly helpful when you start experimenting with more dynamic poses. Knowing where the joints are and how they bend will prevent your drawings from looking stiff or unnatural.
Mastering Poses and Perspectives: Beyond the Static
One of the biggest challenges for aspiring animal artists is capturing movement and dynamism. Too often, drawings end up looking flat and static. The key is to move beyond simply copying reference photos and start thinking about the underlying principles of pose and perspective.
A collection of dynamic animal pose sketches showcasing movement and energy
Start with gesture drawing. This is a quick, loose sketching technique that focuses on capturing the energy and flow of a pose, rather than precise details. Set a timer for 30 seconds, 1 minute, or 2 minutes, and quickly sketch the animal’s overall shape and movement. Don’t worry about getting the anatomy perfect; focus on the line of action – the imaginary line that runs through the animal’s body, defining its pose. Practice gesture drawing regularly, and you’ll start to develop a sense of rhythm and movement in your drawings.
Next, explore different perspectives. Don’t limit yourself to drawing animals from the side or front. Experiment with drawing them from above, below, and at an angle. This will force you to think about how the animal’s form changes in three dimensions. Use perspective grids to help you maintain accurate proportions and create a sense of depth. Consider the environment – how does the animal interact with its surroundings? Drawing an elephant from a low angle, emphasizing its massive size, will have a very different impact than drawing it from a high angle.
Think about weight distribution. How is the animal supporting its weight? Where is its center of gravity? These factors will influence the pose and make it look more believable. Observe animals in real life or in videos, paying attention to how they move and balance. Try to capture that sense of weight and momentum in your drawings. This is where understanding anatomy really comes into play – knowing how the muscles and bones work together to support the animal’s weight.
Experimenting with Art Styles: Finding Your Voice
Now for the fun part! You’ve built a solid foundation in anatomy, pose, and perspective. Now it’s time to experiment with different art styles and find your own unique voice. Don’t be afraid to step outside your comfort zone and try something new.
Consider these options:
- Realism: Focus on capturing the animal’s likeness with meticulous detail. This requires a strong understanding of anatomy, light, and shadow.
- Cartoon: Simplify the animal’s form and exaggerate its features for a more playful and expressive look. Think Disney or Pixar.
- Watercolor: A beautiful and expressive medium that allows for soft washes and delicate details.
- Digital Painting: Offers a wide range of tools and techniques, allowing you to create everything from realistic paintings to stylized illustrations.
- Line Art: Focus on creating strong, expressive lines to define the animal’s form.
- Abstract: Break down the animal’s form into geometric shapes and colors, creating a more conceptual representation.
Don’t limit yourself to just one style. Try combining different techniques and experimenting with different materials. For example, you could create a realistic watercolor painting with a cartoon-style background. Or you could use digital painting to create a textured, painterly effect.
Look at the work of other animal artists for inspiration. What styles do you admire? What techniques do they use? Don’t copy their work directly, but use it as a starting point for your own experimentation. The goal is not to replicate their style, but to learn from their techniques and develop your own unique approach. How to drawing animals effectively also means finding your way to draw them.
The Power of Observation and Reference
Throughout your artistic journey, never underestimate the power of observation. Spend time studying animals in real life, at zoos, or in documentaries. Pay attention to their behavior, their movements, their expressions. The more you observe, the more you’ll understand, and the more accurately you’ll be able to capture their essence in your drawings.
Reference photos are also invaluable. Don’t be afraid to use them, but don’t rely on them completely. Use them as a starting point, but then add your own interpretation and creativity. Try to find reference photos that show the animal in the pose and perspective you want to draw. Pay attention to the lighting and shadows, and use them to create depth and dimension in your drawings.
Remember, drawing animals is a lifelong learning process. There will be times when you feel frustrated or discouraged, but don’t give up. Keep practicing, keep experimenting, and keep learning. The more you put into it, the more you’ll get out of it.
Sharing Your Work and Connecting with the Community
Finally, don’t be afraid to share your work with others. Join online art communities, participate in art challenges, and get feedback from other artists. Sharing your work can be a great way to learn and grow, and it can also be incredibly motivating.
Consider creating an online portfolio to showcase your work. This could be a website, a blog, or a social media profile. Use it to share your drawings, sketches, and paintings, and to connect with other animal lovers and artists.
Remember, the art community is a supportive and welcoming place. Don’t be afraid to ask questions, offer feedback, and collaborate with others. Together, we can all learn and grow as artists. And who knows, maybe your art will inspire someone else to pick up a pencil and start drawing animals too!
WildWhiskers is a dedicated news platform for animal lovers around the world. From heartwarming stories about pets to the wild journeys of animals in nature, we bring you fun, thoughtful, and adorable content every day. With the slogan “Tiny Tails, Big Stories!”, WildWhiskers is more than just a news site — it’s a community for animal enthusiasts, a place to discover, learn, and share your love for the animal kingdom. Join WildWhiskers and open your heart to the small but magical lives of animals around us!


